
Serena and Lily Inspired Chair

This is the picture that caught my attention and would not let go.
It is from a high-end, highly customizable furniture website. I love just about everything about it but the thing that REALLY caught my eye was THE SOFA! (Click here to see it OR keep reading to do it yourself without sewing!)
The skirt on that sofa is to die for! Wouldn’t it be nice if they had chairs just like it…
Oh, but they do!
Then I saw the price – EEK! It was over $3000 for ONE CHAIR before any customization. By the time I paid that puppy off, I’d be on to my next chair-love! Not gonna happen.
Even though I liked the look of the high-end chair, it didn’t even start to accommodate The Three Fs: FUNCTION, FRUGALITY, and FLASH FACTOR.
Hmmm. Was I asking for too much? Apparently, yes since I have yet to come across such a chair to tick off The Three F’s! That’s why DIY makes so much sense.

This is one of the chairs BEFORE I added any trim.
To be honest, I had just purchased a set of chairs (see left) and I had started to customize them when I stumbled upon that awesome trim.
And the price and function of my chairs was fantastic, BUT I was NOT a fan of that lovely metal bar that showed underneath.
Flash factor FAIL!
So I made my own “skirt” with some chunky trim from a craft store.
Here is a picture of my first customization. So much better than the original chair! This would have been IT if the fringe trim had not captivated my imagination.

Trim I used before I discovered the fringe trim.
I needed to find that trim!
The trim is called TRELLIS FRINGE TRIM or CHAINETTE TRELLIS FRINGE TRIM. I did some minor lifting for you because figuring out the name of this stinking beautiful trim was a bit of a challenge! You’re welcome.
I was on the hunt for cream-colored 4-inch trim which I found at, wait for it… Amazon! I was surprised but glad because it is SOO convenient to have it in two days but in the end, I had to return it. Too flimsy. Dang.
I found it online at several other places (Trims by the Yard was AWESOME) but was a little apprehensive about the price. So I thought I’d try the ol’ brick-and-mortar next.
Enter JOANN FABRICS. Nothing beats getting a sample in real time and trying it out before you buy. I thought it was a long shot but I couldn’t believe THEY HAD IT! I got a few sample inches first and then went back and with a coupon, I got it for 50% off!
DING DING DING! Winner! (You will need to sign up for their emails to get the special coupons!)

My next hurdle was to find an alternative to sewing because when I attached the first chucky trim, sewing was tedious and difficult.
I didn’t want to hot glue the trim (but it would work) because gluing it at that angle would be difficult not to mention HOT because I would most definitely use HIGH TEMP glue. Then I’d need gloves and a cup of ice water for burns…you get the point, yes?

Evil Screws of Frustration and Ugliness
After google searches on attaching trim without sewing it, I hit on these Evil Screws of Frustration. Not only are they dated and ugly (my grandmother used them in the 1970s!), they are not very effective. I had used them before and they are hard to twist in and don’t stay put, in my opinion.
Then I found TIDY PINS.
dah- dah- DAH!!!

Tidy Pins - kept the trim in place with no sewing!
I did some google searches on how these worked and didn’t find much but there was a review from one woman who raved about them and that was all I needed to try them.
At this point I was willing to find anything other than laying on the floor on my belly sewing with a rounded upholstery needle and rubber finger protectors (aka thimbles). Although please note, if you’d like to hand-sew trim on, it absolutely works!
TIDY PINS work way better than I thought they would and were way easier than those little screws of frustration. It took a little practice but they did the job beautifully! (See video for demo)
They directions said they “virtually disappear”. They really didn’t but they were not that noticeable to me but I dabbed a little paint over the top anyway.
If you want to hide the pins but don’t have the paint, consider gluing a small bit of left-over string over the pin! I had already painted when I thought of this but it would totally do the job (and probably better)!

The final result of my chair makeover is STUNNING! Even Ollie wanted her picture taken with it!
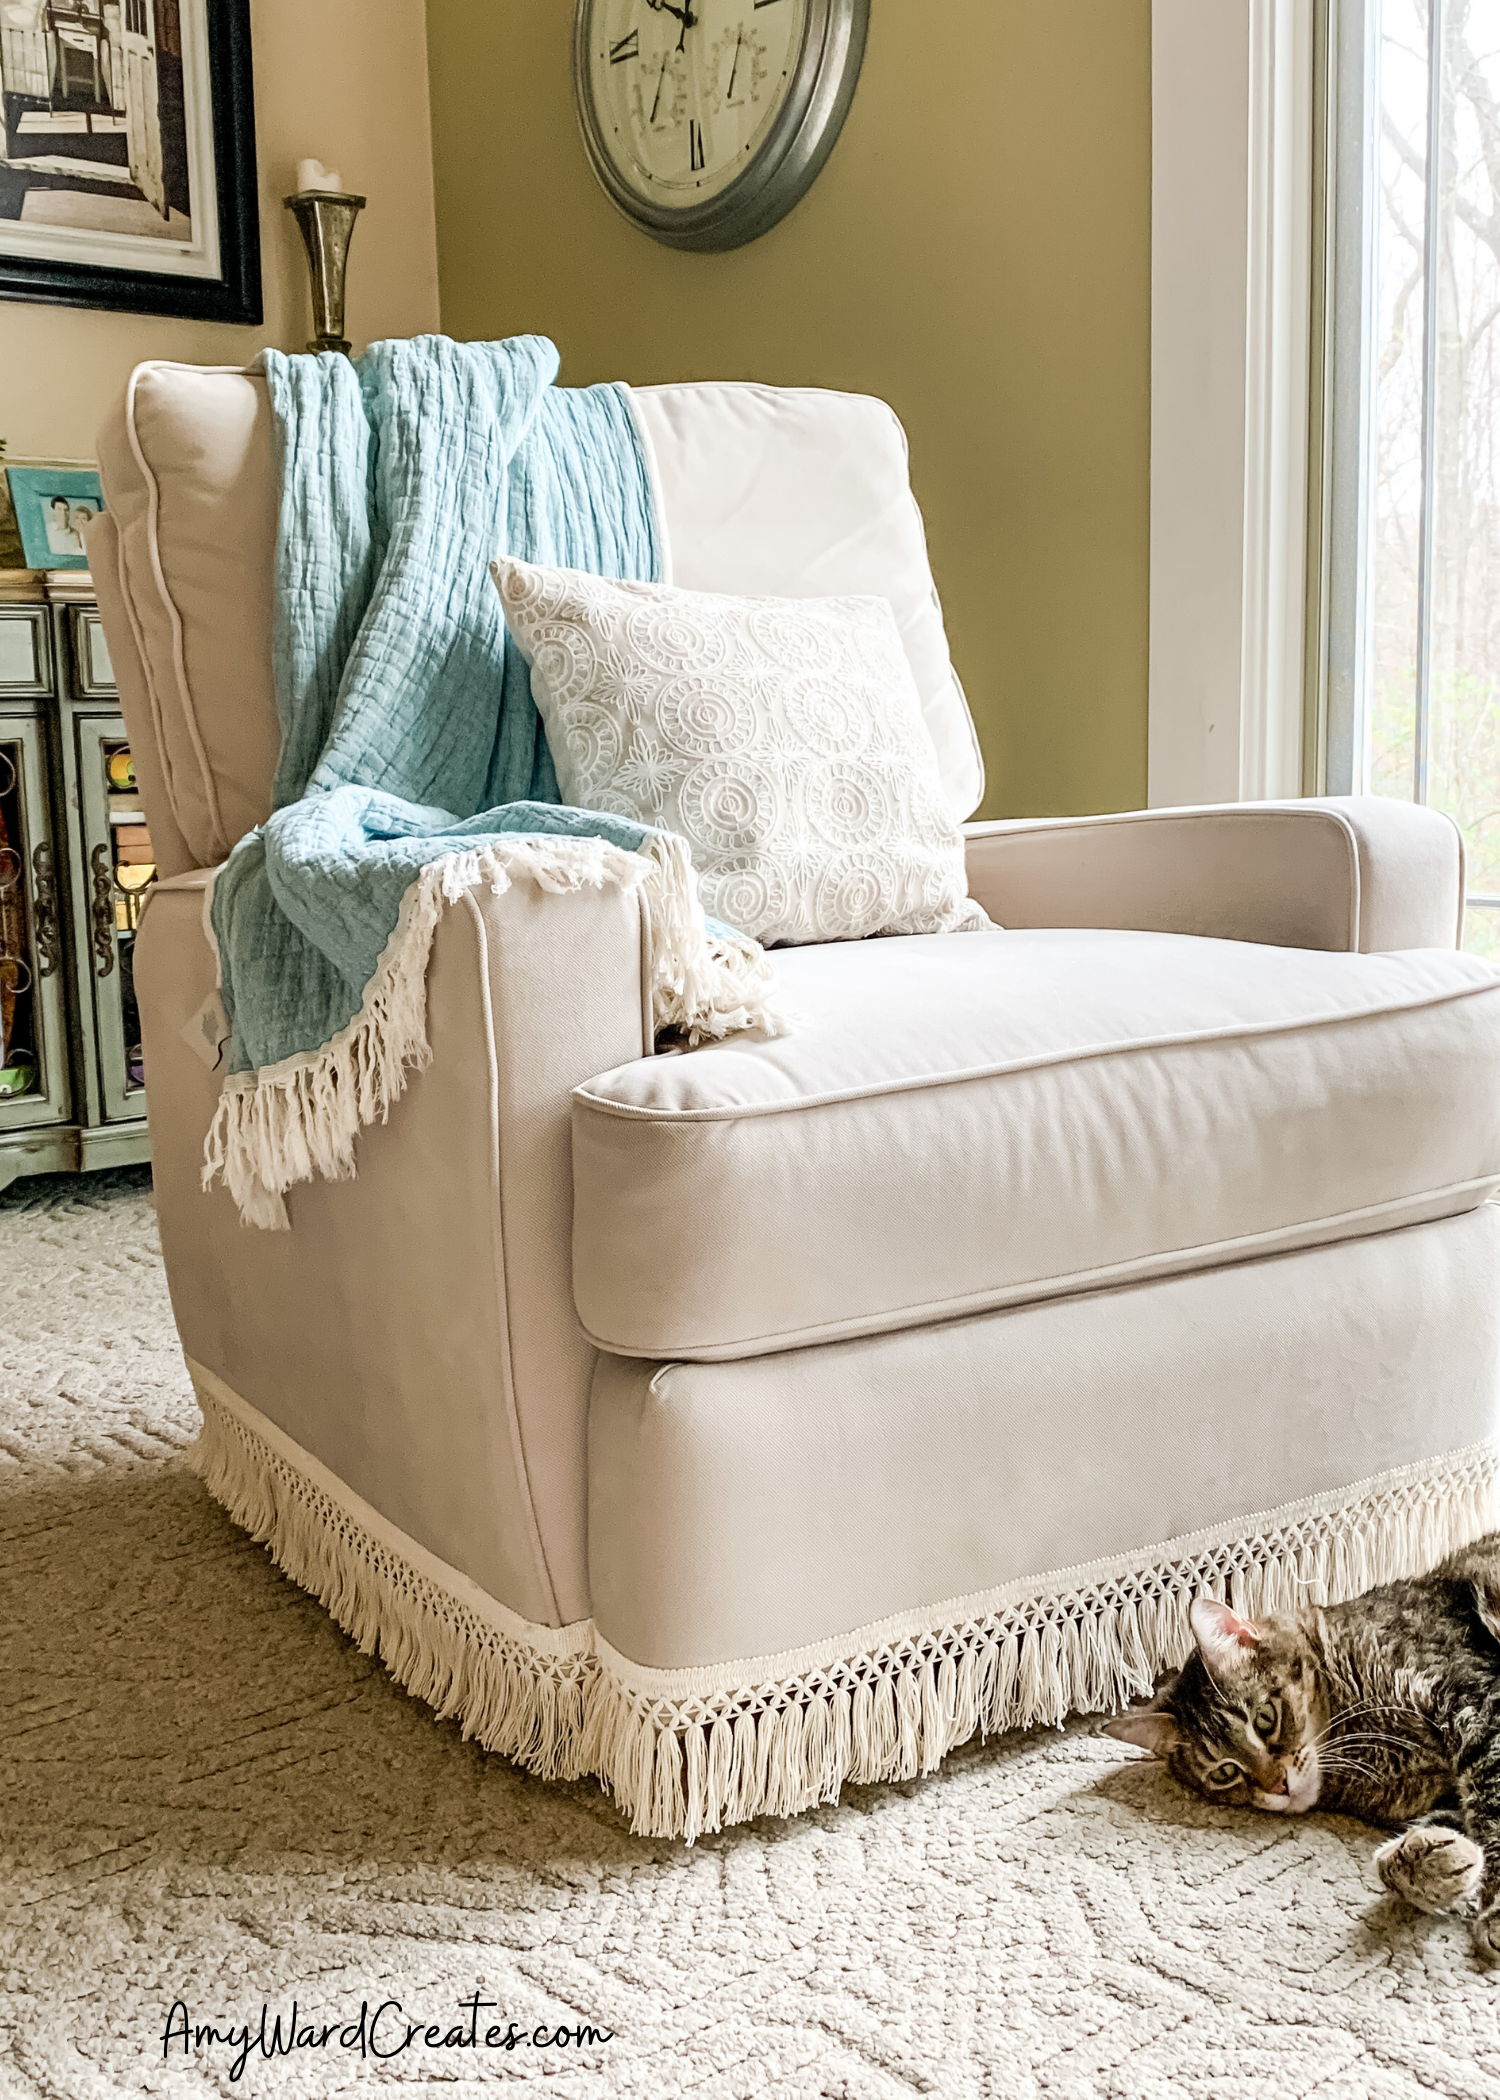


I couldn’t be happier with how it turned out! And you will love it too.
I did want to point out that another alternative to sewing is to use a staple gun. This might work if there was a hard backing behind the fabric. Keep in mind that it is possible that staples might be more visible, but if you try it and like it, let me know!
One last thing: since my chair reclines which means the front panel will have foot pressure on it, I did sew the trim on the front panel with BEADING THREAD (extra durable). And yes, I used a rounded upholstery needle and those uncomfortable rubber thimbles to do it.


But the good news is, if you use TIDY PINS (or the staple gun or even hot glue), you will not need to deal with any sewing and it will be done much quicker than mine! Yay for you!
Now it’s YOUR TURN.
Let me know how it goes!!!!
Happy Creating, Amy

Materials:
Trellis Fringe Trim (or any other trim you may love!)
Tape measure
Stick Pins (For pinning it in the correct spot first)
Tidy Pins
scissors
Directions:
Measure around the base of the piece of furniture you will be attaching the trim.
Convert to yards and always add a little more to be comfortable.
Leave the stabilizer string on until the end. This keeps it from getting tangled. (See below.)
Pick a side of the chair or sofa that is NOT IN VIEW most of the time.
Choose a spot that is NOT in the middle but closer to one of the corners but not ON a corner.
Use a stick pin to tack it in place so it hangs just above the floor. (See photo below)
Do this all the way around the chair or sofa.
Pin the end of the trim OVER the raw edge of the beginning.
You should now have a “skirt” around the entire chair.
Tack it again but this time use the TIDY PINS. (See video on how they work.)
Hide the Tidy Pins by painting with a matching paint or by gluing leftover trim pieces.
That’s it! Enjoy and please share pictures if you can!

Use stick pins to tack it in place first.

The bottom edge of the trim might have a stabilizer string. Pull this off carefully LAST. This can be used to hide the tidy pins. Just glue a small piece on top.