
DIY Dragonfly Pour and Drip Painting
With all the amazing DIY acrylic pour projects out there, I wanted to get in on the fun! So I set out to use the same materials but come up with a new project using them and this DIY Dragonfly Pour and Drip Painting was the awesome result.

It is super easy and anyone can do it! And you can do it without any drawing (video below). If you can trace and image, you can use my handy-dandy transfer technique! (Again, video below)
But just in case you are curious about doing a classic acrylic pour, check out How to Do an Acrylic Pour at Step by Step Painting. It has easy-to-follow directions on how to do it.
It’s important to remember that any type of pour or drip painting has unexpected results so be patient with yourself. I used plain paper or cardboard for quick experiments but and then I used painted chipboard and canvases for the paintings.
Did you know Dollar Tree has canvases for a dollar?!? I didn’t! It’s super inexpensive for trying out designs!
Once you have your surface picked out, you will need a pouring medium.
What is a pouring medium?
Pouring mediums make any paint pourable without losing vibrancy. Water can be added to make paint pourable but vibrancy is lost and the paint becomes light and more transparent because it’s being diluted.
After doing a little research online, I bought Apple Barrel Pouring Medium.
After mixing half paint and half medium as per the directions, I tested it to make sure that the drip traveled to the bottom of the canvas. If your paint does not travel down the page easily, add more pouring medium.

ABOVE: My first Blob and Drip painting
BELOW: I made the blobs into abstract plants
With this mixture, the drips flowed easily down the canvas so I made what I call a blob and drip painting. (See right)
I let the paint pool in puddles before I tilted the canvas so the paint would run off the edge.

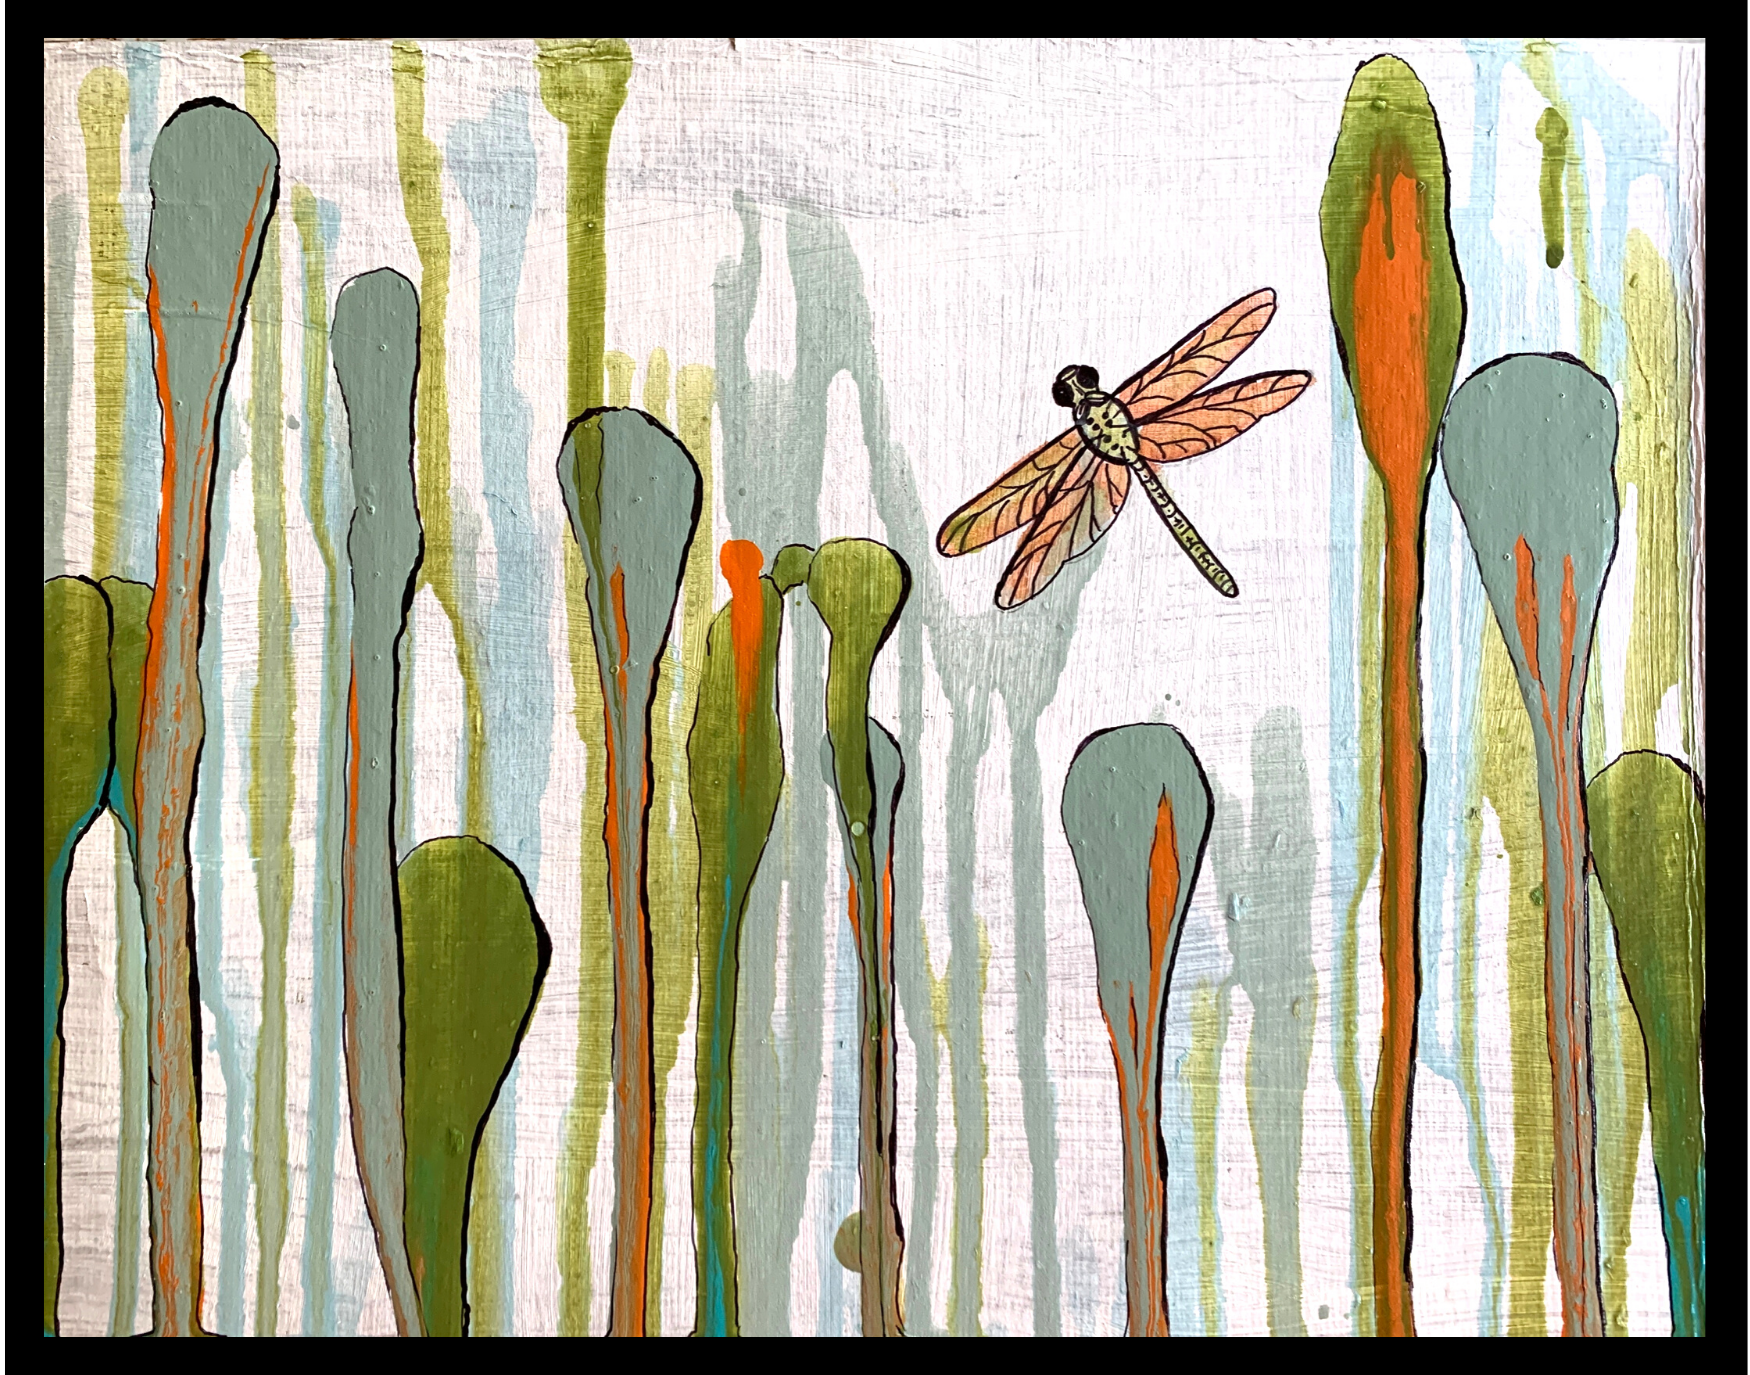
The drips and blobs reminded me of marshland or swampland grasses so for the next Blob and Drip painting I was inspired to outline with Sharpie and add some stylized botanical features.
This is what happened to the right. Cool, huh?
I also used a Bic white-out pen to add some white accents as well.
I wanted to explore the wetland grasses idea so I did another painting but this time, I wanted a very light background so I added water to the paint mixture.
This made the paint super light and it poured fast!

Then, I did the blob and drip technique.
It ended up looking something like this below. I could have left it but I thought it needed more.

I used Sharpies to outline the drips in the front and then I added the dragonfly and a Dragonfly Pour and Drip Painting was born!
I have done a lot of these paintings but here is the one that is in the video tutorial below.
The video shows all the steps with details. If you have any questions, don’t hesitate to shoot me a question.
Finally, after the Pour and Drip Dragonfly Painting was done, I had leftover paint so I had some fun pouring, blobbing, dripping, and splattering!
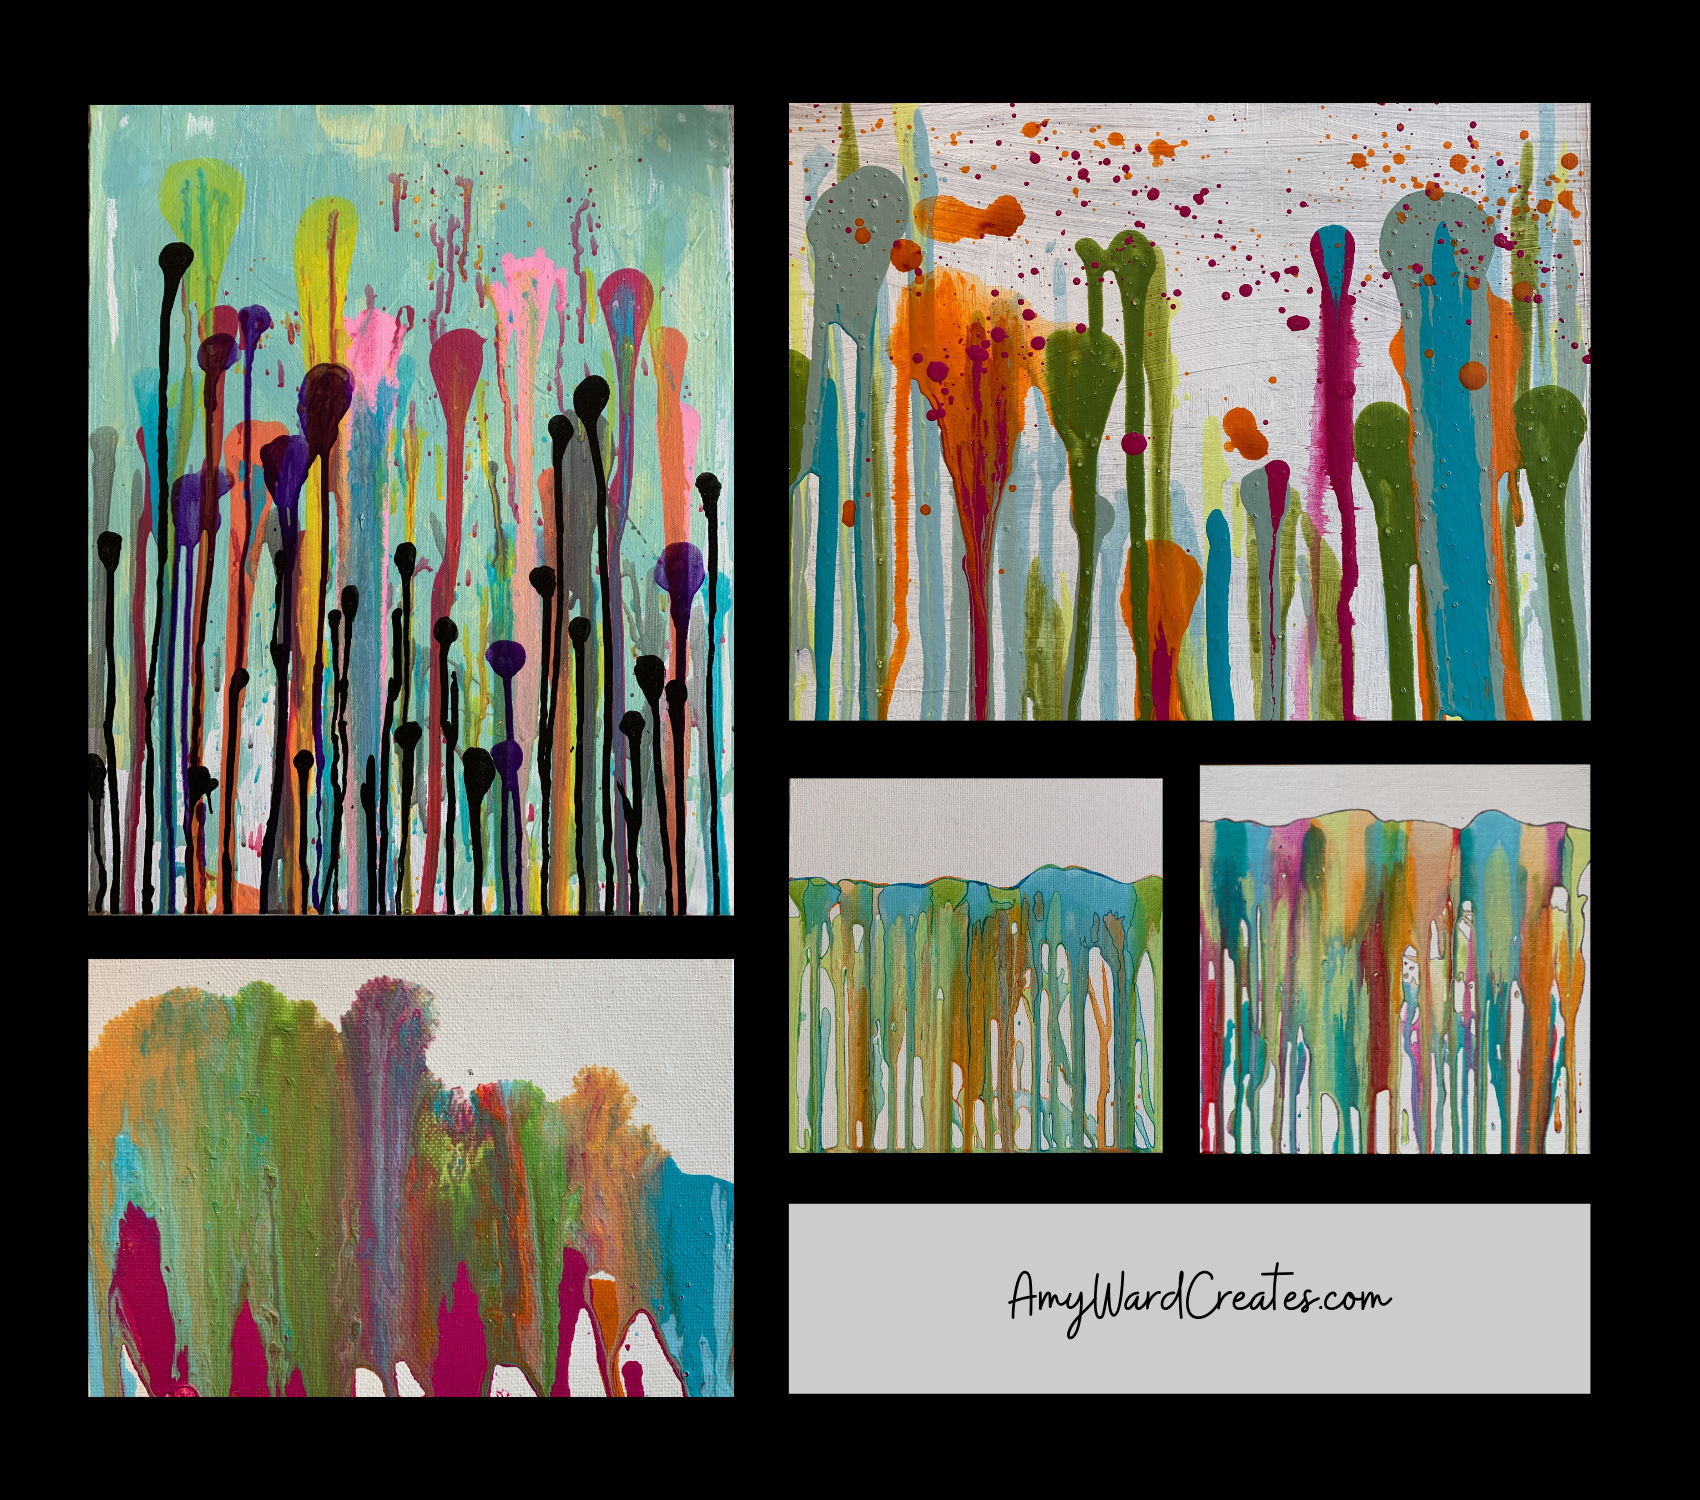
ABOVE: All my leftover paint went to good use!
Now it’s your turn! I can’t wait to see what you come up with.
Happy Creating, Amy