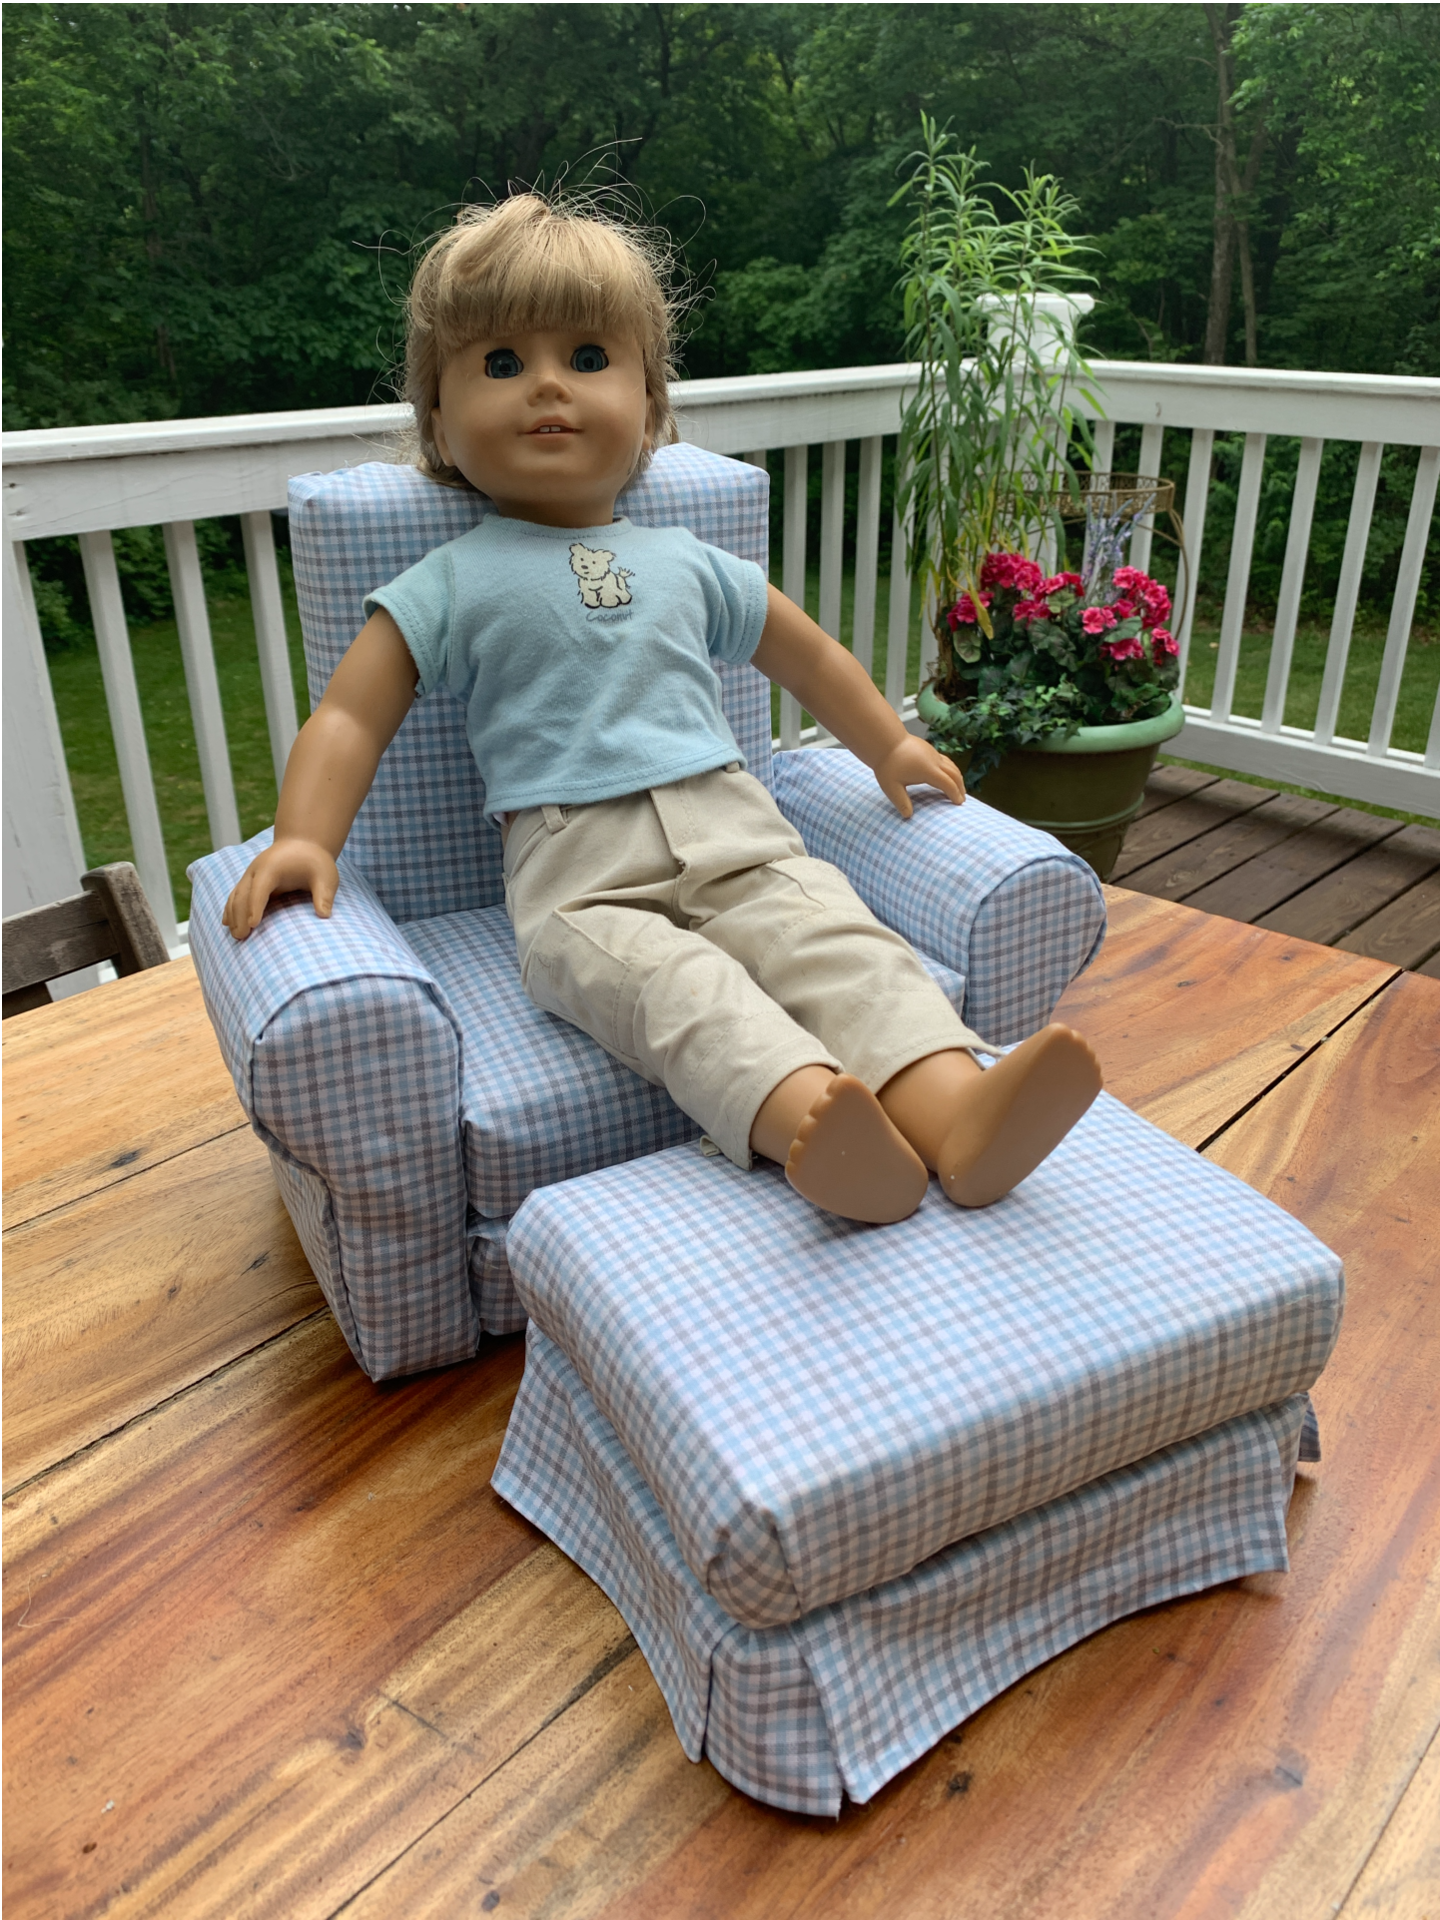
American Girl Doll Chair (With Bonus Ottoman!)
Click here to go to directly to video tutorial.
Click here for print directions.
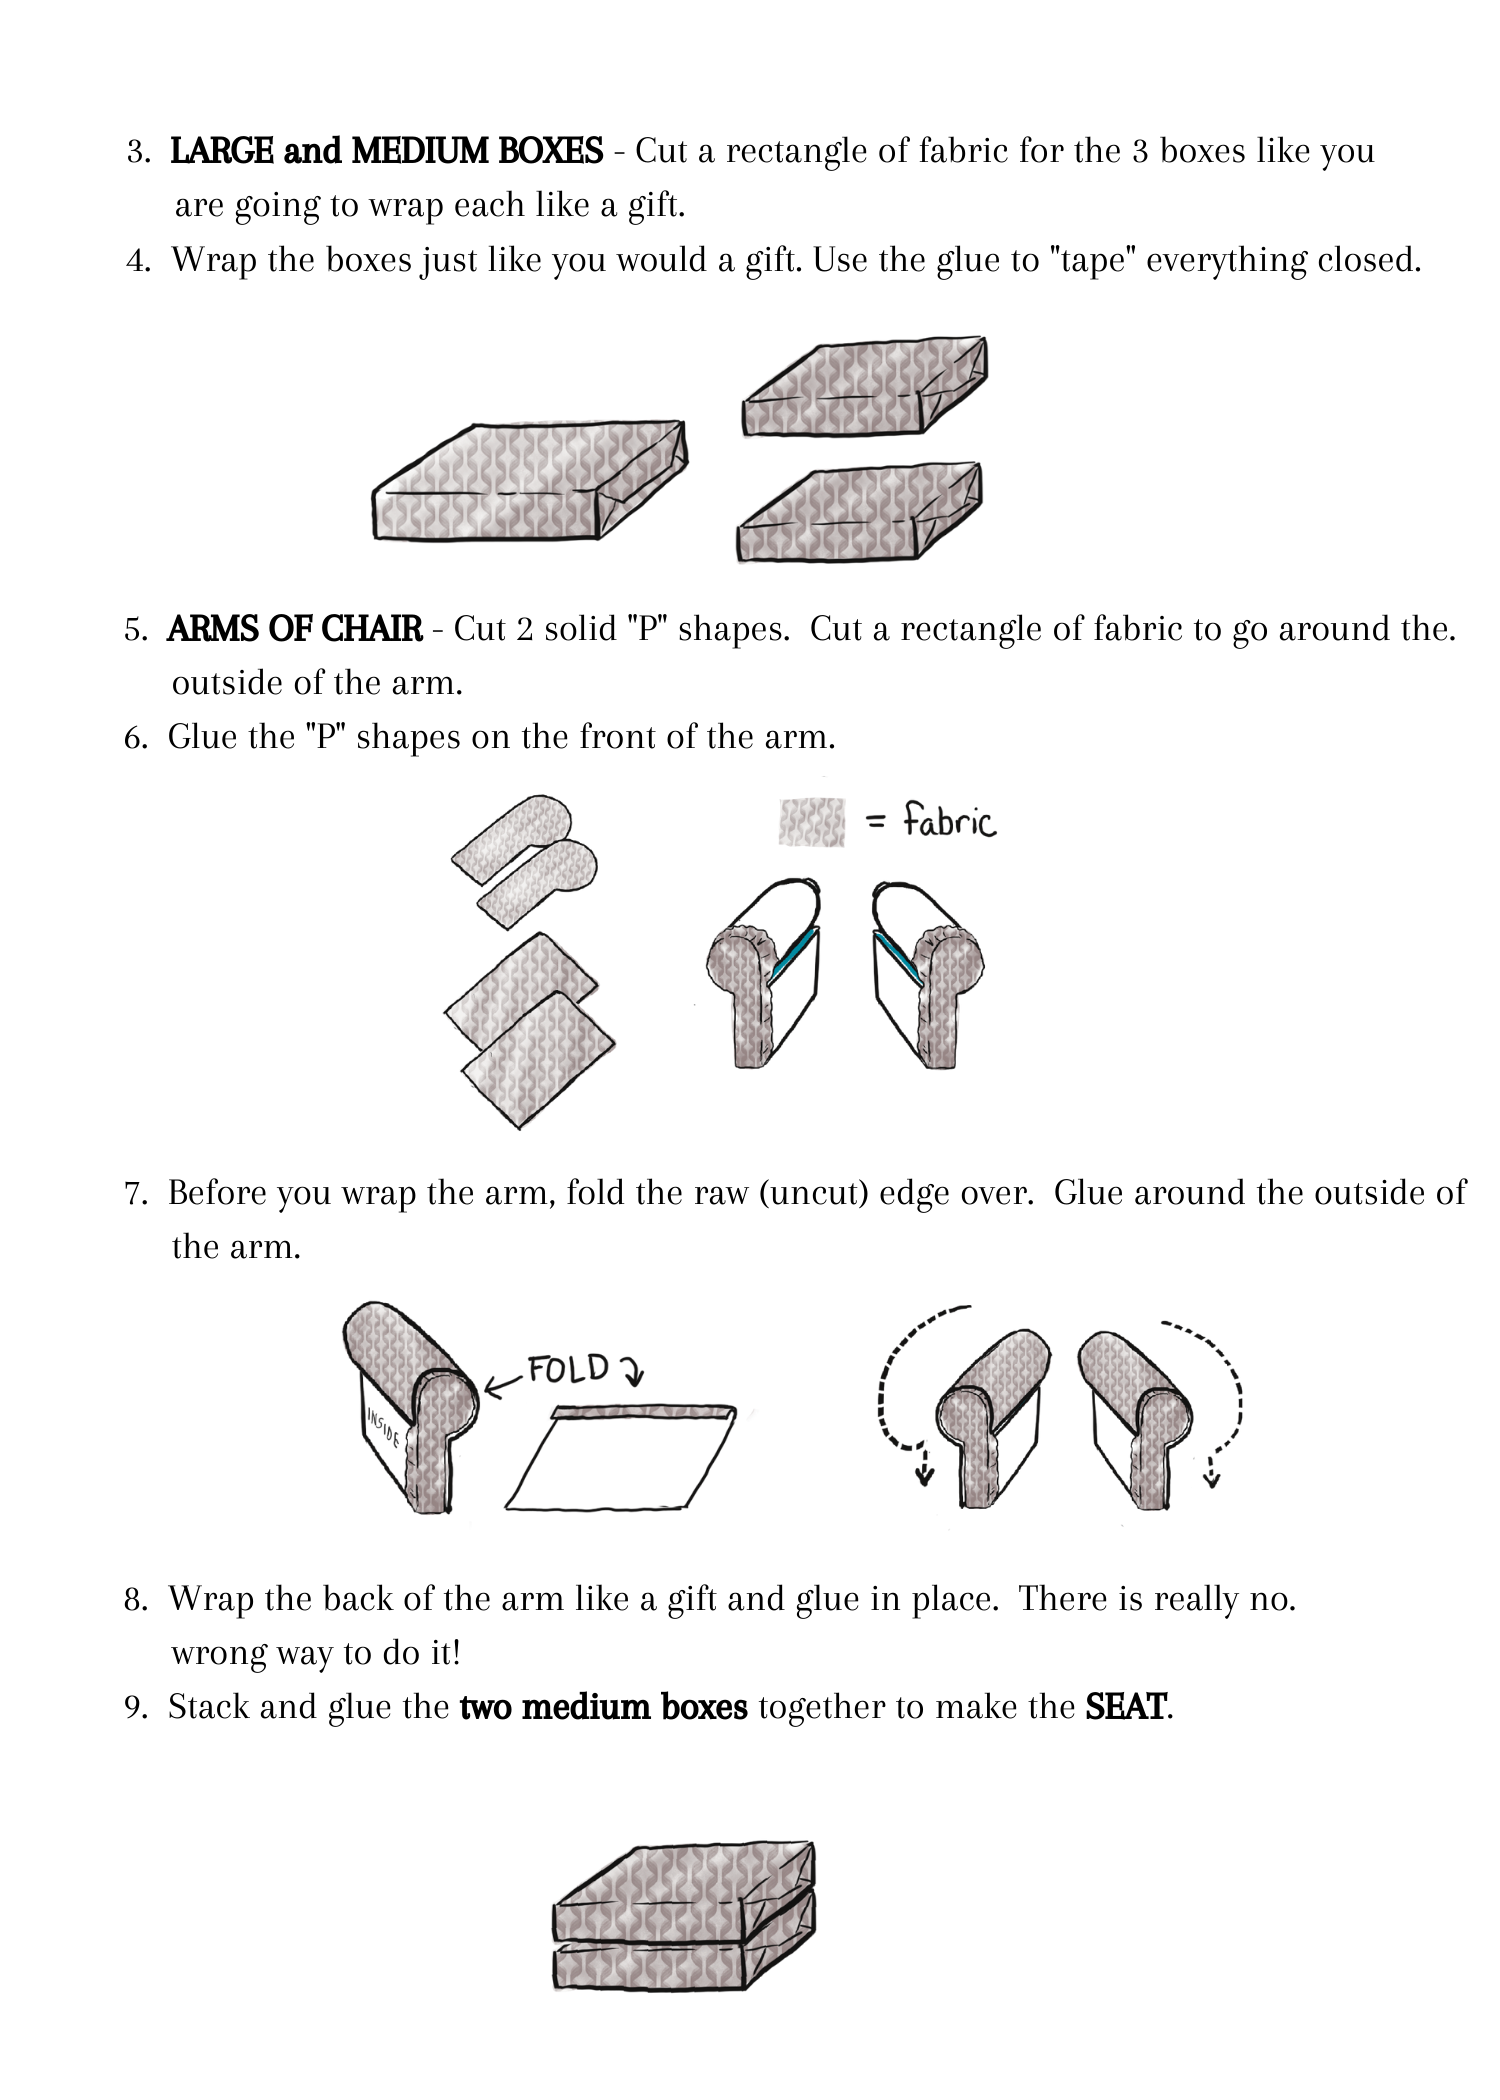
This project did not start out as a doll chair. It was a bear chair. Then, a stuffed mouse chair.
I made the first one for my son Max when he wanted one for his teddy bear. Like his mom (smile), he was fascinated with miniatures, especially ones that look like the real thing.
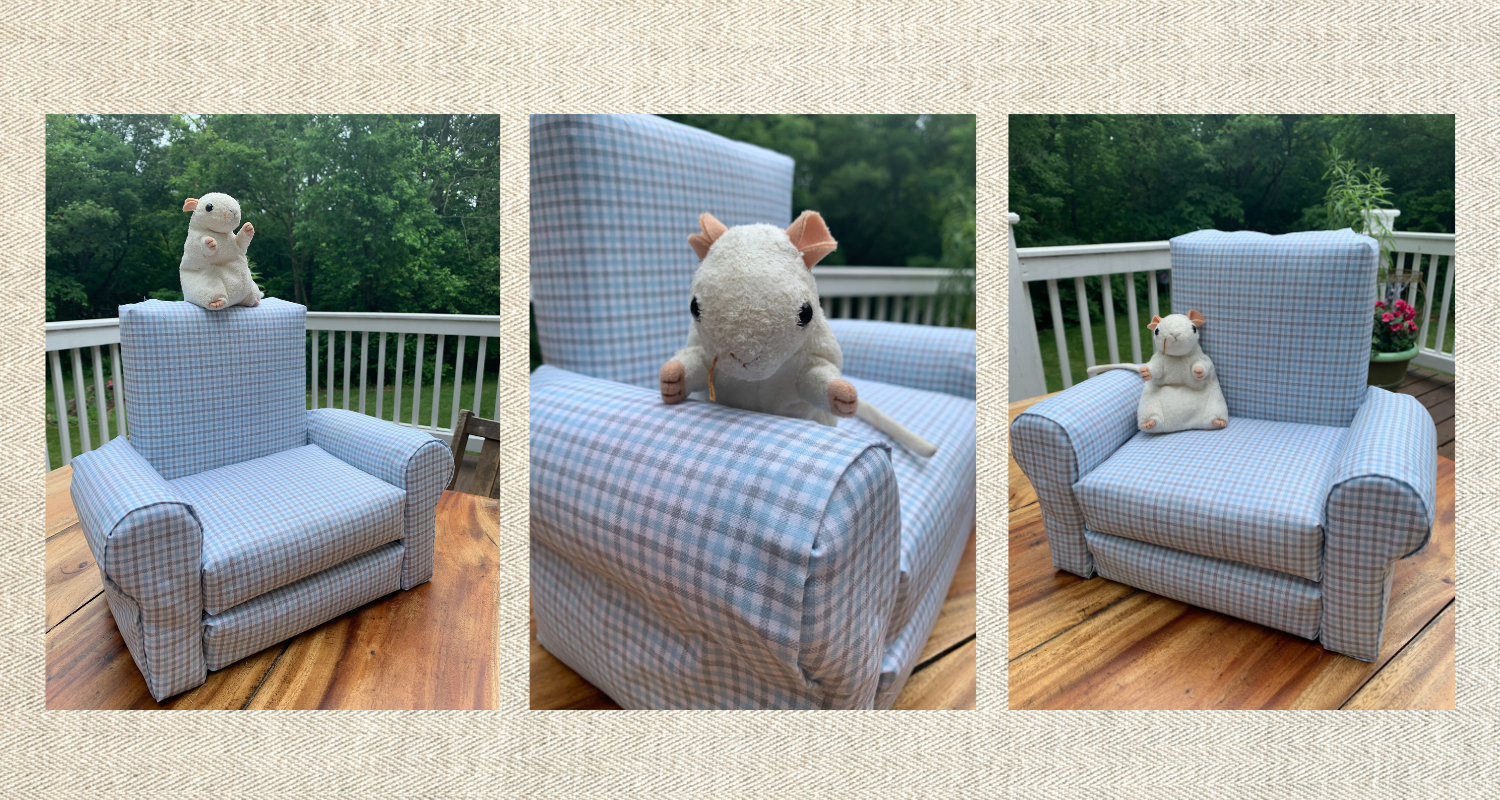
Later, the chair became Marshmallow’s, the little stuffed white mouse that was Max’s companion for years. I got out the raggedy little stuffed mouse for a little photo shoot with the chair I made for this project. (below)
It became an American Girl doll chair when I made one for a gift for little girl’s birthday party.
One of the nicest reasons for making a little chair instead of buying one is you “upholster” it in any color or print. The store-bought ones were usually in pink or purple. I made Max’s original chair red plaid. It matched his room.
Another benefit of making a little chair is it is easy on the wallet - around $12 for glue, fabric and batting. The boxes, bottles, and shredded paper are FREE.
AND if you recycle an old shirt or pillowcase, the fabric can be FREE too!
Kids can also make these chairs with the help of an adult (because of the hot glue gun!).
A few years back I did a class on these chairs with a dozen little humans (who each came with a big human helper), all making a chair for their stuffed animal or doll. It was adorable!
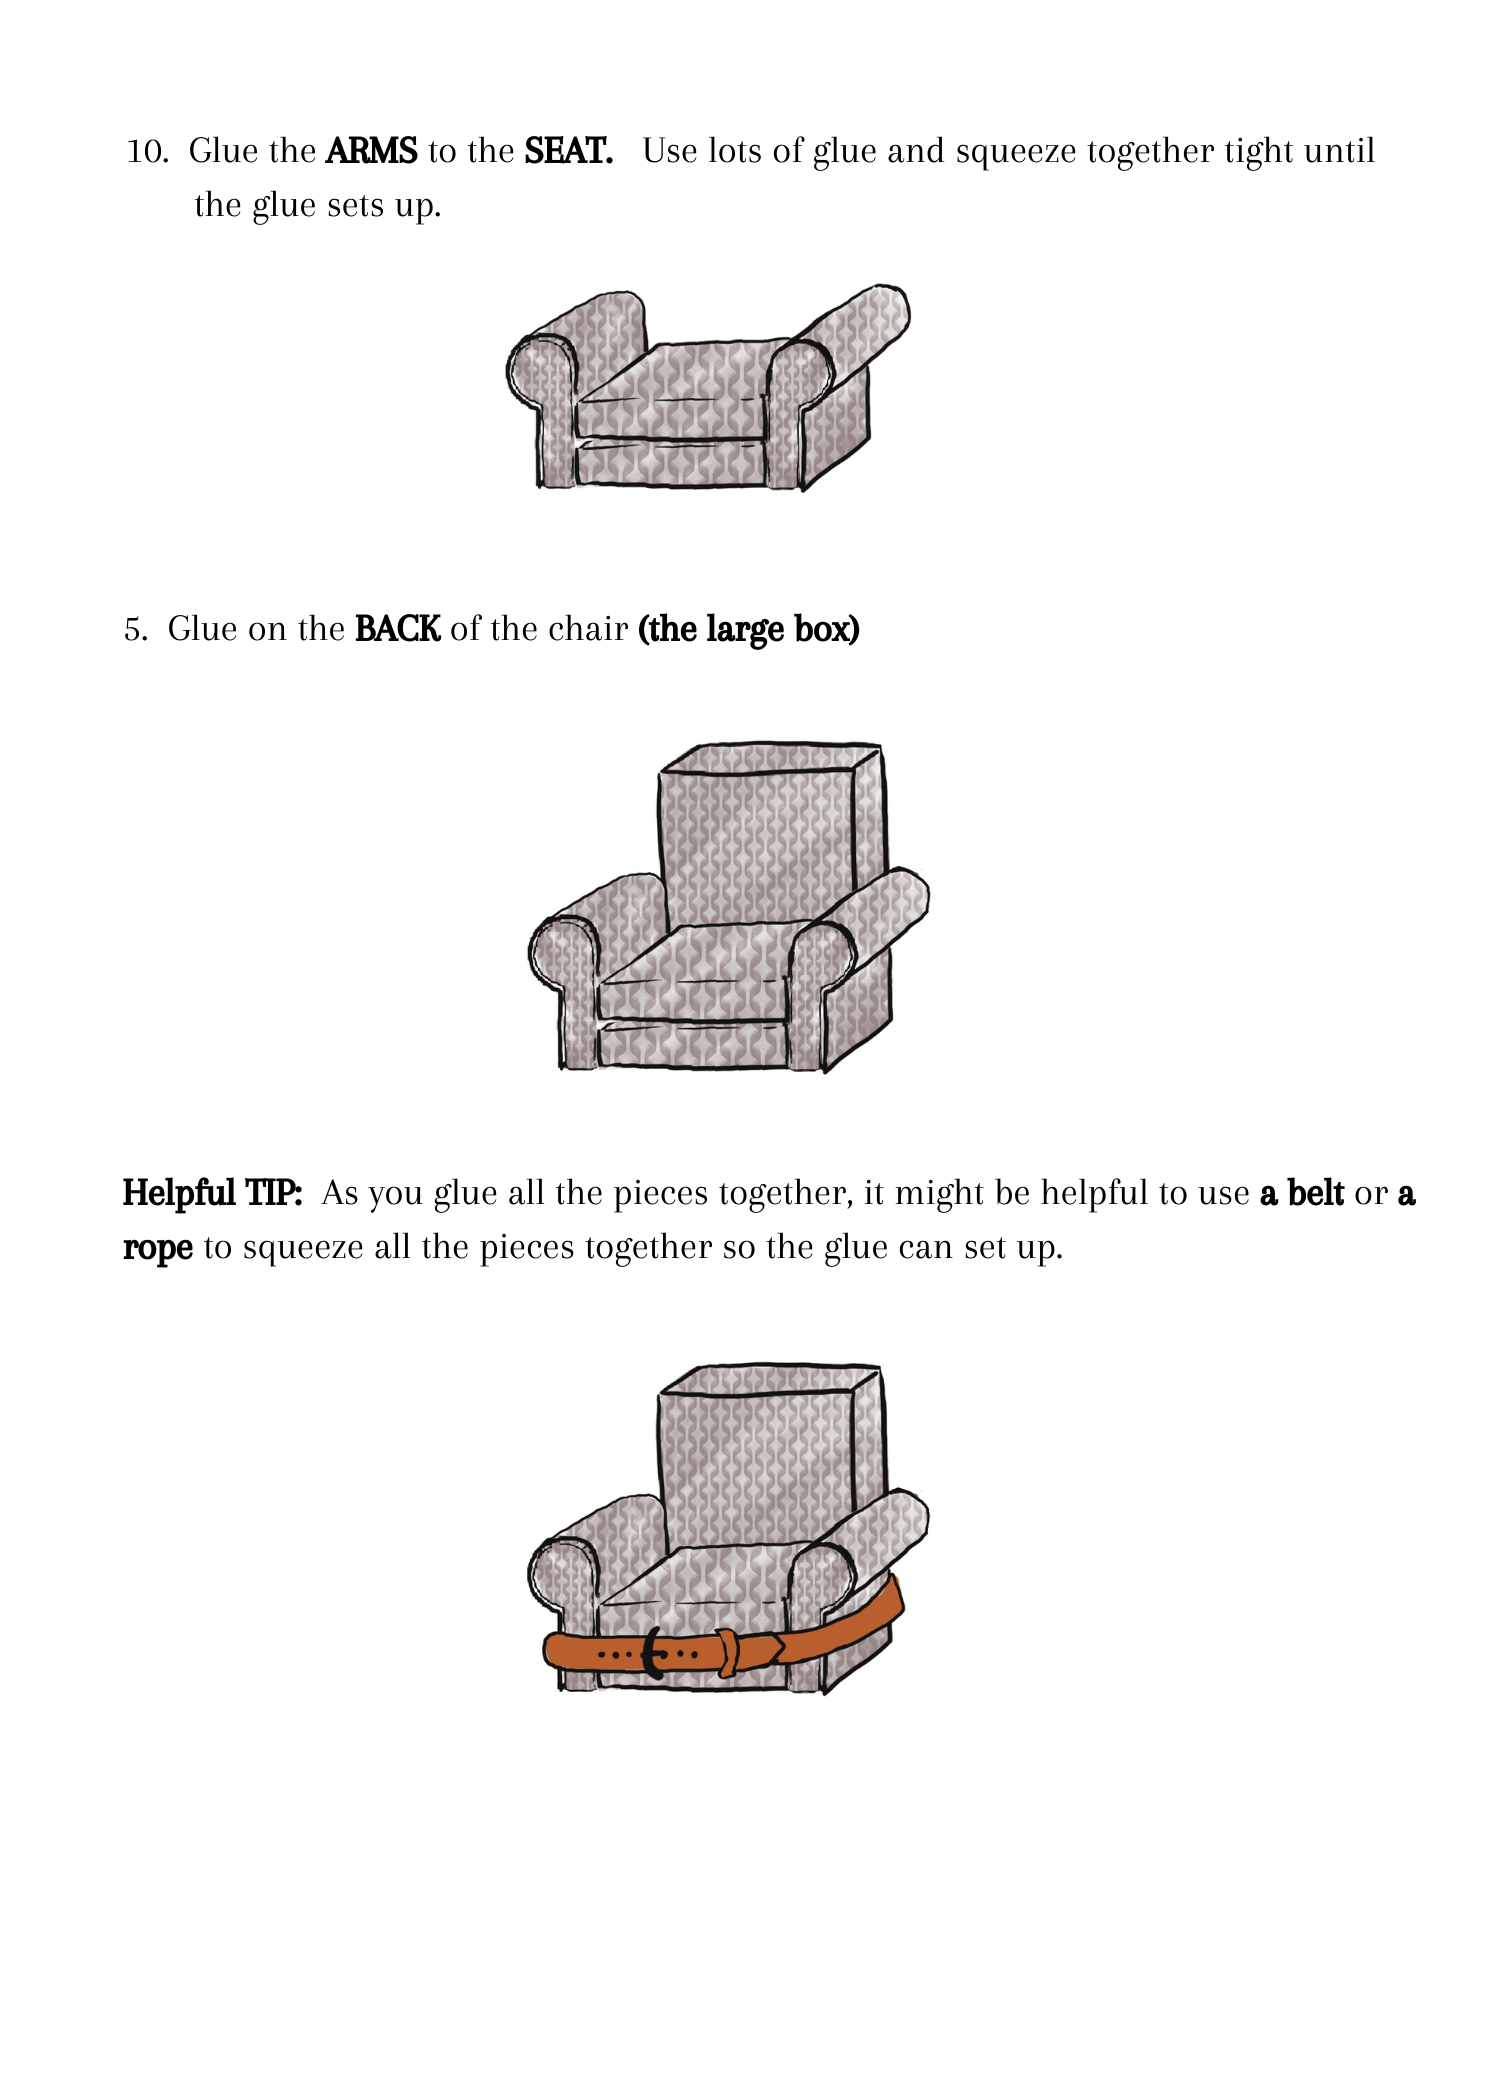
How did I make a little chair that looked like the real thing? (Click here for Video and directions are below!) I had just upholstered a big chair for our living room, so I understood the mechanics of it. I needed to make a form and then cover it in padding and fabric.
After playing with some boxes from the pantry, I figured out the form using a cereal box, two cake boxes, two macaroni and cheese boxes, and two water bottles.

Hollow boxes are not strong, so I solved that issue by stuffing them heavily with shredded paper. I covered all the pieces in batting (the stuffing for quilts) and then fabric.
And that was pretty much it! I’ve been wanting to share this idea for YEARS so others can have the benefit of making a little person happy with this one-of-a-kind creation.
So if you want to get in on the fun (who doesn’t?), I’ve made a video AND included written directions with illustrations below.
Please don’t hesitate to contact me if you have any questions!
And as always…
Happy Creating!
Amy