
Animal Collage Art Lesson
This was a FUN project! I did this with 5th grade students and the results couldn’t have been better.
But before we get to the meat of the project, I have a few people to thank:
Thank you Tik Tok users! A Tik Tok post of mine (@amywardcreates) went viral featuring parts of this project. Check it out @amywardcreates.
At the time, I didn’t know who the original creator was but I do now so a big thank you to Elementaryartfun.blogspot.com and artist, art teacher and blogger, Natalie Waggenspack. She is the original creator of the project so be sure to check out her blog post!
This project took several weeks with 5th grade because it was my first time doing it. If I were to do it again, it will be way less time because of the resources I made and edited along the way.
ANIMAL COLLAGE ART LESSON
Objectives:
students will use a reference photos when making the collage animal
students will create papers for collage by painting, stamping, coloring, making patterns etc.
students will use the concept of BALANCE to create the paper collage face
Materials:
various papers (I cut 9” by 12” into two 4.5” by 12”)
various art mediums (use what you have: paint, markers, crayons, printing ink, etc.)
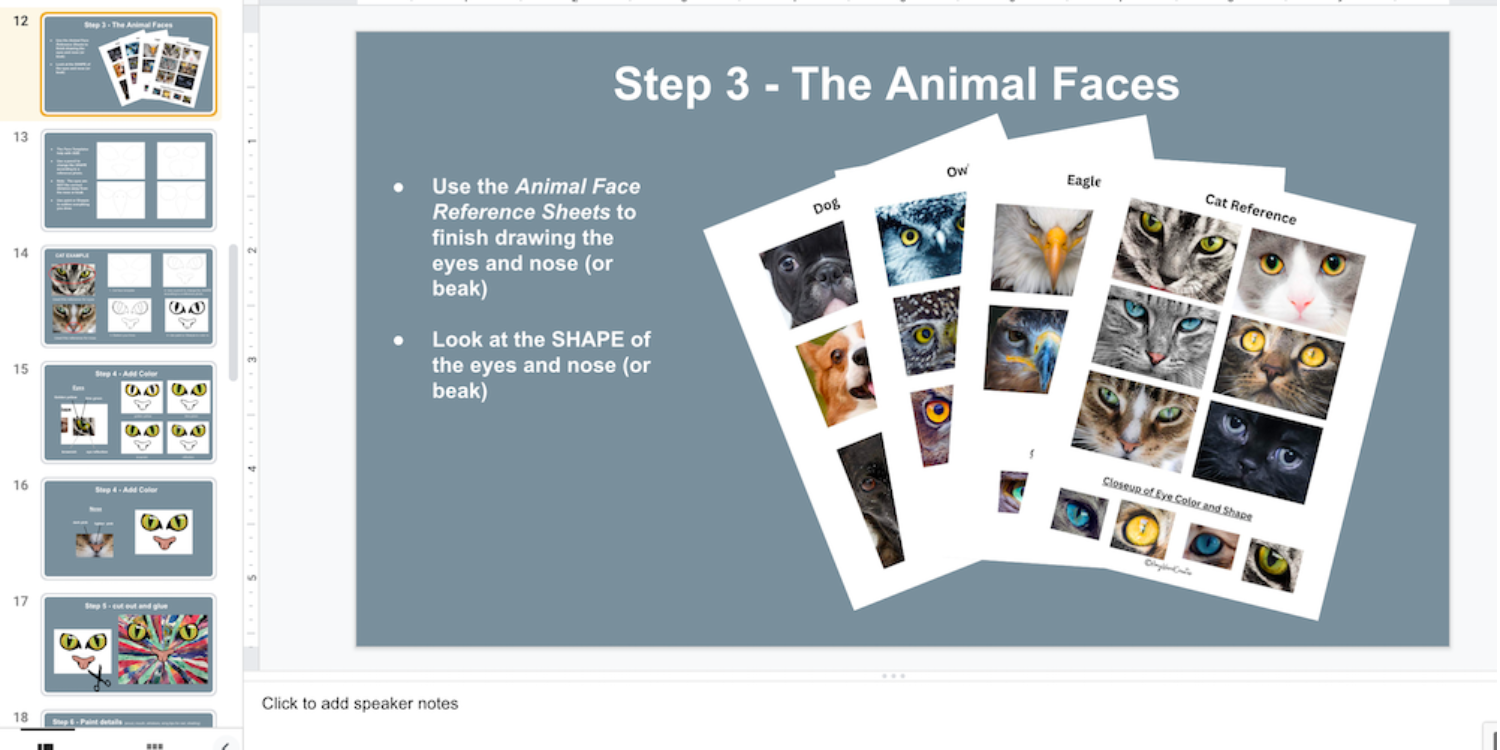
animal face references (Packet at TpT or make your own!)
black poster board - 12” by 16”
animal face templates printed on paper (Packet at TpT or make your own!)
animal reference sheets (Packet at TpT or make your own!)
black acrylic paint (Other options: black Sharpie or pastel)
white acrylic paint. (Other options: white pastel)
paint brushes
glue
scissors
chalk (optional)
Kwik Stix paint sticks (Other options: pastel, acrylic paint, tempera paint)
Directions:
STEP 1 (1-3 days): Students will make beautiful papers. Each day provide students another material to experiment with. My students were to have a goal of three papers done each day. Making paper is a GREAT way to use unwanted or hard-to-use paper from your art room or paper stash. Here are the paper and mediums I used:
watercolor paint (on book pages, construction paper, and poster board scraps)
painted papers (acrylic or tempera painted and stamped on any paper)
Paper marbling (shaving cream and food coloring on white construction paper)
Free day to finish papers (markers, crayone, Sharpies etc.)

STEP 2: Pass out black poster board.
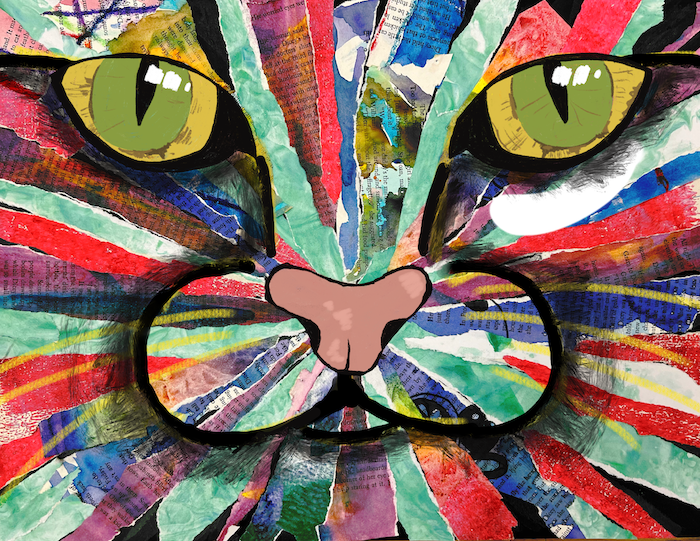
Use animal photo reference sheets to place an “x” on the black poster board where the NOSE will be. Note that hair and feathers on animals spread outward like a sunburst from the nose.
Tear or cut papers (from step 1) into long, thin triangles.
Glue on the black poster board with triangle tips meeting at the “x” (nose).
STEP 3: Pass out animal face templates. This will help guide the students to the correct sizes for the eyes and nose.

Using the animal reference sheets, students will complete the animal face template using a pencil. Various circles for tracing (lids, cans etc.) might be helpful for younger artists.
Outline everything using a detail paint brush and black paint.

STEP 4: Color the eye iris.
Using Kwik Stix paint sticks or other colored medium, students will use the animal reference sheets to color the iris of the eyes.
Talk about eye reflections. Demonstrate and have students use white acrylic paint or white out to add reflection spots.

STEP 5: Cut out the eyes and nose. Use animal reference sheet to place them the correct distance apart. Glue them on.

STEP 6: Finish details like snout, mouth, whiskers, wing tips (owl) and shading.
Use chalk to draw details using the animal reference sheet. (see image above!)
Trace details black. (We used acrylic paint but Sharpie or oil pastel would work too.)
Demonstrate shading using a dry brush technique or other.
That’s all of it! Here are some MORE examples of my 5th grader’s work!
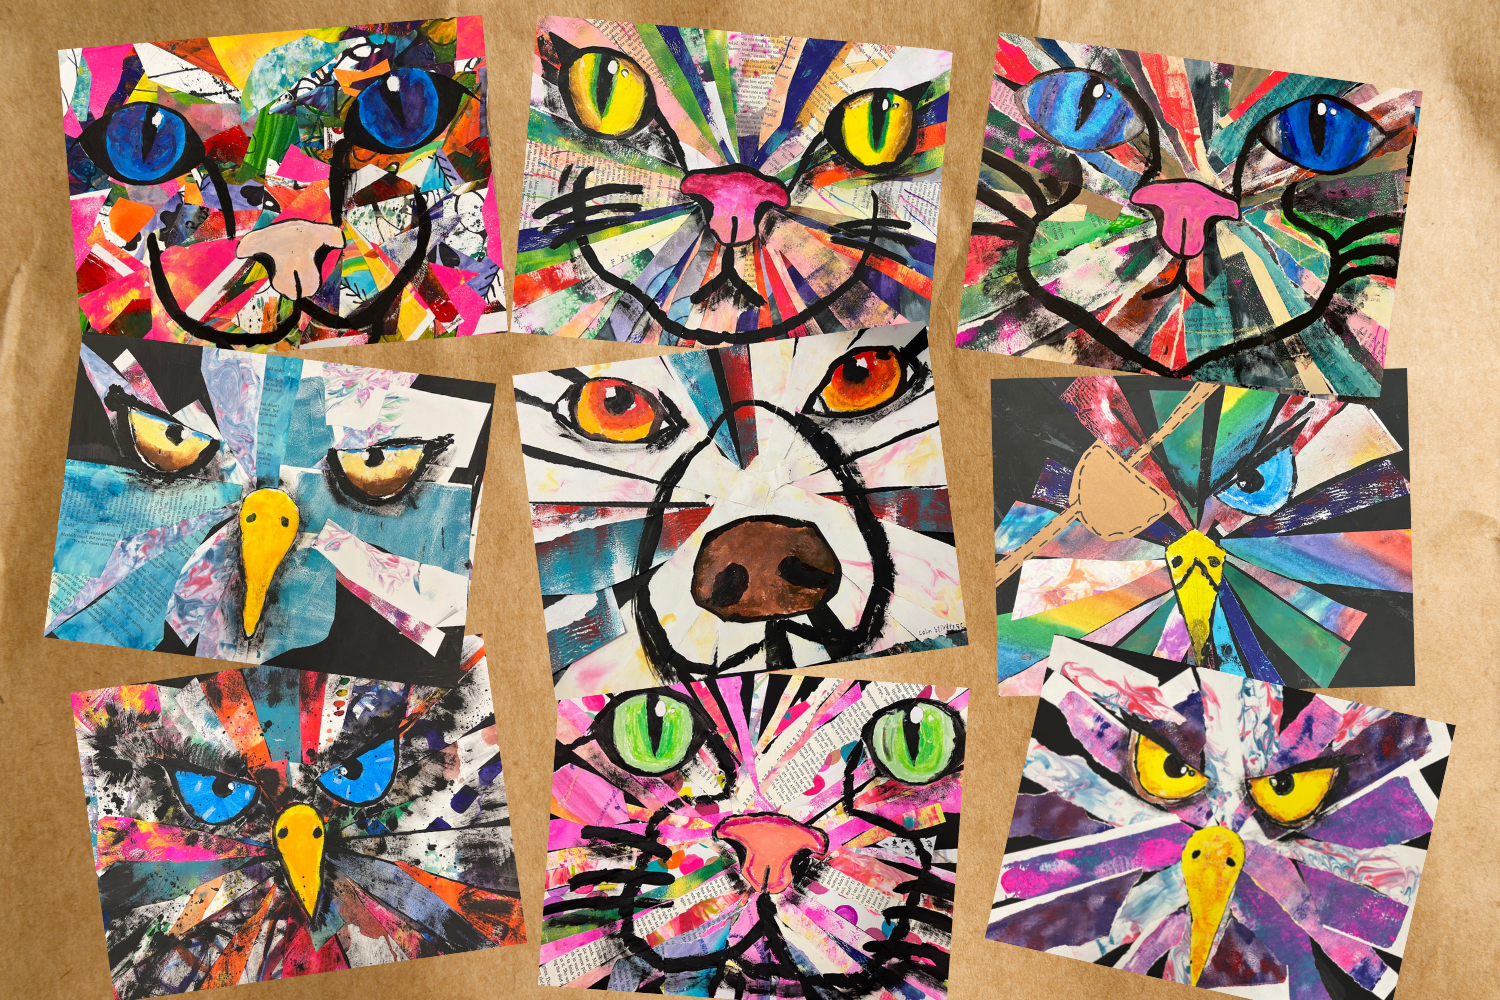
WOW - they ROCKED it!
If you do this project, tag me on Tik Tok, Pinterest, FaceBook, or Instagram @amywardcreates!
Happy Creating! - Amy