
How I Made My Refrigerator Look Built-in
My husband and I make a great team when it comes to home-improvement projects. I am the designer, and he is the carpenter. I am very lucky because design is what I enjoy.
When I told him I wanted to make our refrigerator look like a built-in, he hesitated. I could tell right away, this was going to be a little bit of a battle.
I have always wanted a built-in refrigerator. In my opinion, more than any other kitchen built-in, it makes the kitchen look finished and streamlined.
But the price tag – sheesh! Built-ins start at around $5000 and go up from there! We were not willing to spend that much on one appliance.
The next compromise is to get a counter-depth refrigerator. Much more affordable but still more expensive than a free-standing regular fridge. If we had not pushed back the wall behind the refrigerator when we built, I would have bought a counter-depth refrigerator.
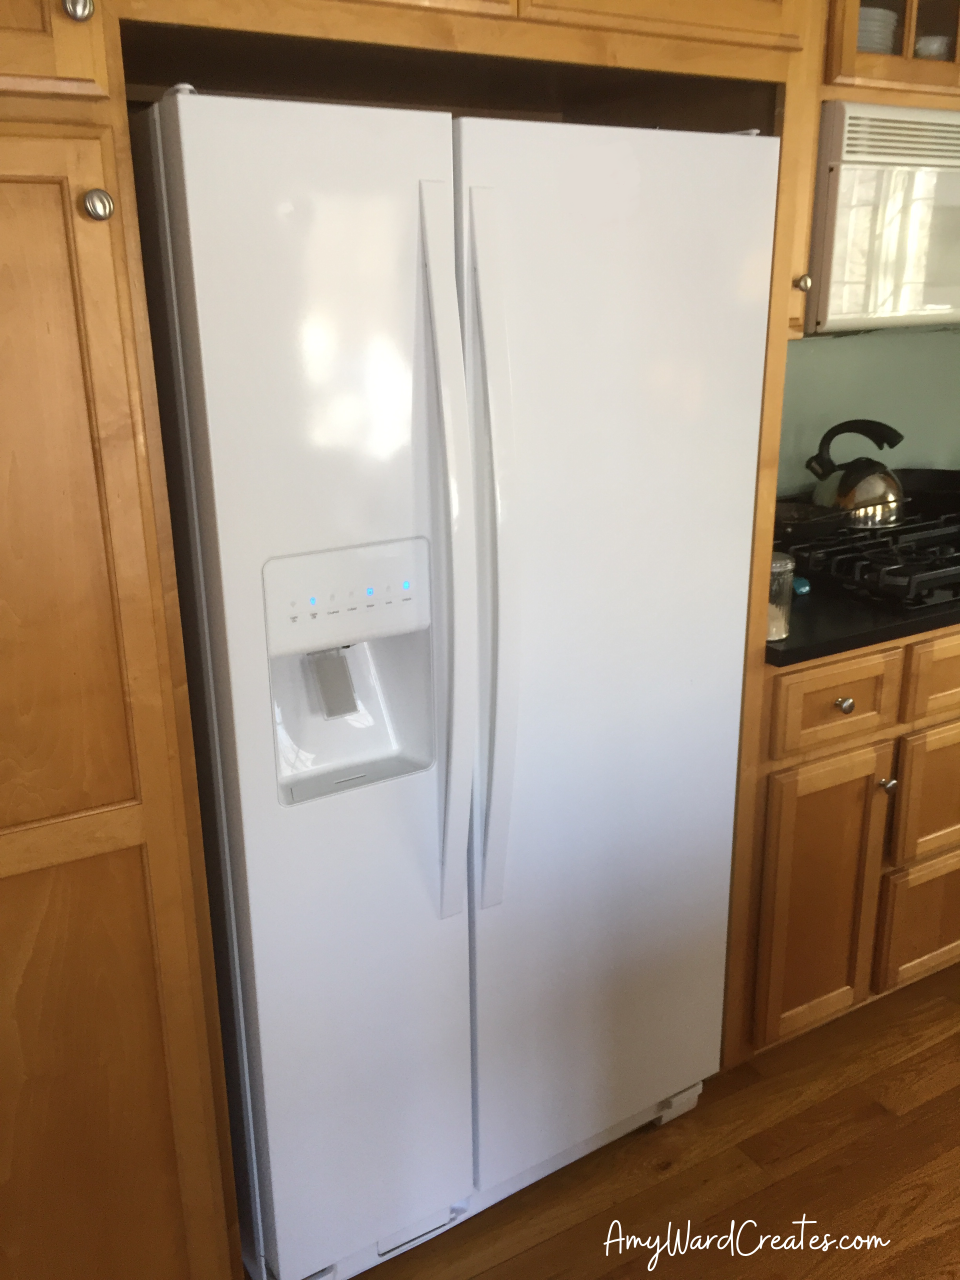
I knew there had to be a way to make a regular fridge look more built- in. I am an artist and I firmly believe in where there is a will, there is always a way. And my will for this project was VERY STRONG! Just look at this fridge – not a fan! The trick would be convincing hubs.
The battle begins…
Goal: to make that hunk of white metal look like furniture.
My first idea was to glue (with liquid nails) cabinet panels right to the front of the fridge. Hubby pointed out that the sides of our white fridge would show (point to hubby).
Next, I suggested wrapping them in stained maple paneling. Hubby theorized it would be too heavy for the fridge doors and trying to hide seams at the edges would be super tricky. (Another point to Hubby.)
Hubby was winning and he thought he had thwarted yet another one of my honey-do ideas and I was getting a tiny bit discouraged until alas, I had another idea!
What if we framed the door with wood and then painted it? That would mean the metal from the fridge would become the front of the “cabinet” panel which would be framed with wood. The paint would cover the two materials and look like all wood.
He questioned how it would look having a painted cabinet next to our stained and I assured my math-professor-husband it would look great. Ding, ding, ding! That, he said, would probably work. (10 points to me!)

I started by researching refrigerator handles to match my current kitchen hardware. They can also be expensive but if you do your research, you can find some great deals. Mine were somewhere around $50 a piece. But I have seen them for as little as $25. (…And as much as $300!)
After much discussion of design and execution, we decided on framing it out with 1 by 2-inch strips of wood. I came up with a design. He cut the boards, screwed the handles on to the wood, and started gluing.
He used a type of adhesive like liquid nails called Loctite Power Grab. He wanted something that would grab right away and stay put. But just to be safe, he used painters’ tape to hold it in place.
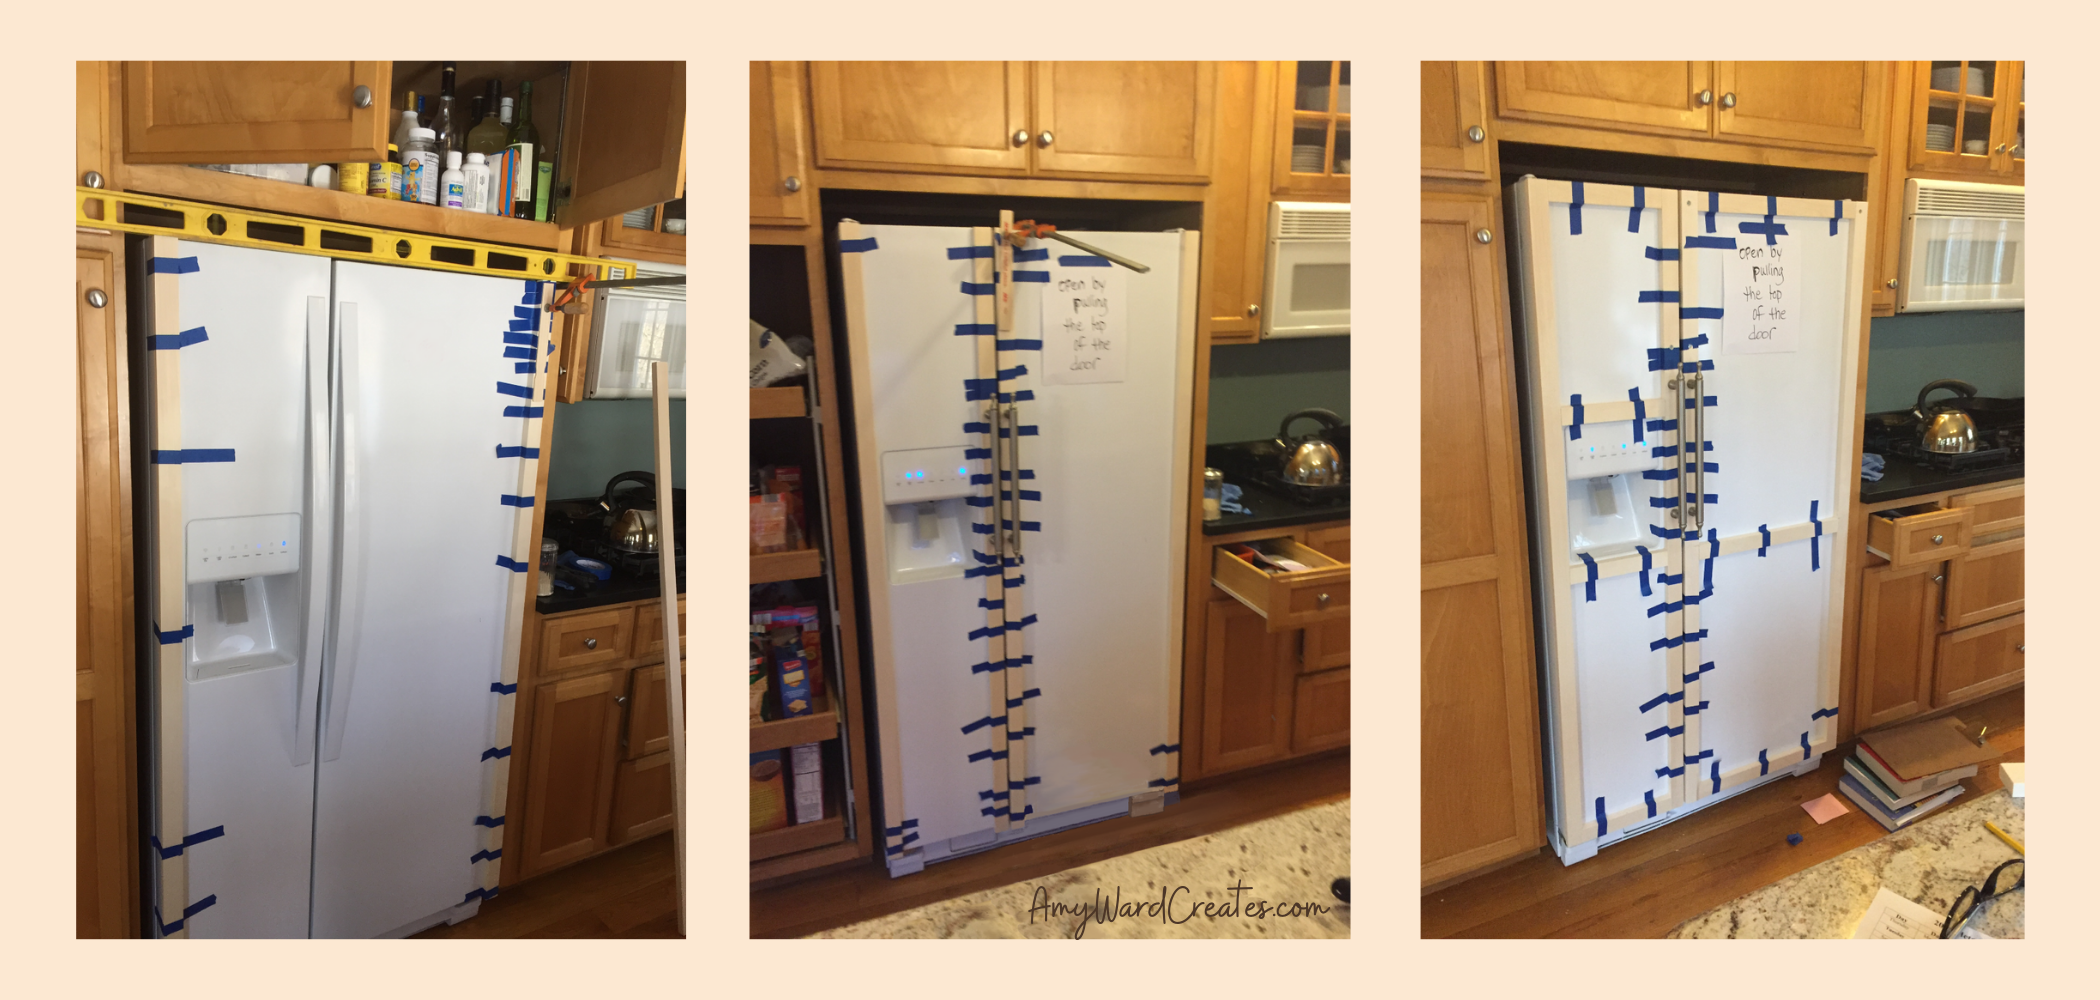
*IMPORTANT - Keep in mind that you might void any warranty on your fridge when doing this project. Even though hubs glued the boards, he screwed a few sheet metal screws into the metal door (not very deep, a quarter to a half inch) to aide in stability. He used screws around the handles and anywhere he felt the boards did not sit tight to the fridge door. You can see where in this picture below. (There was also one BELOW each handle as well.)
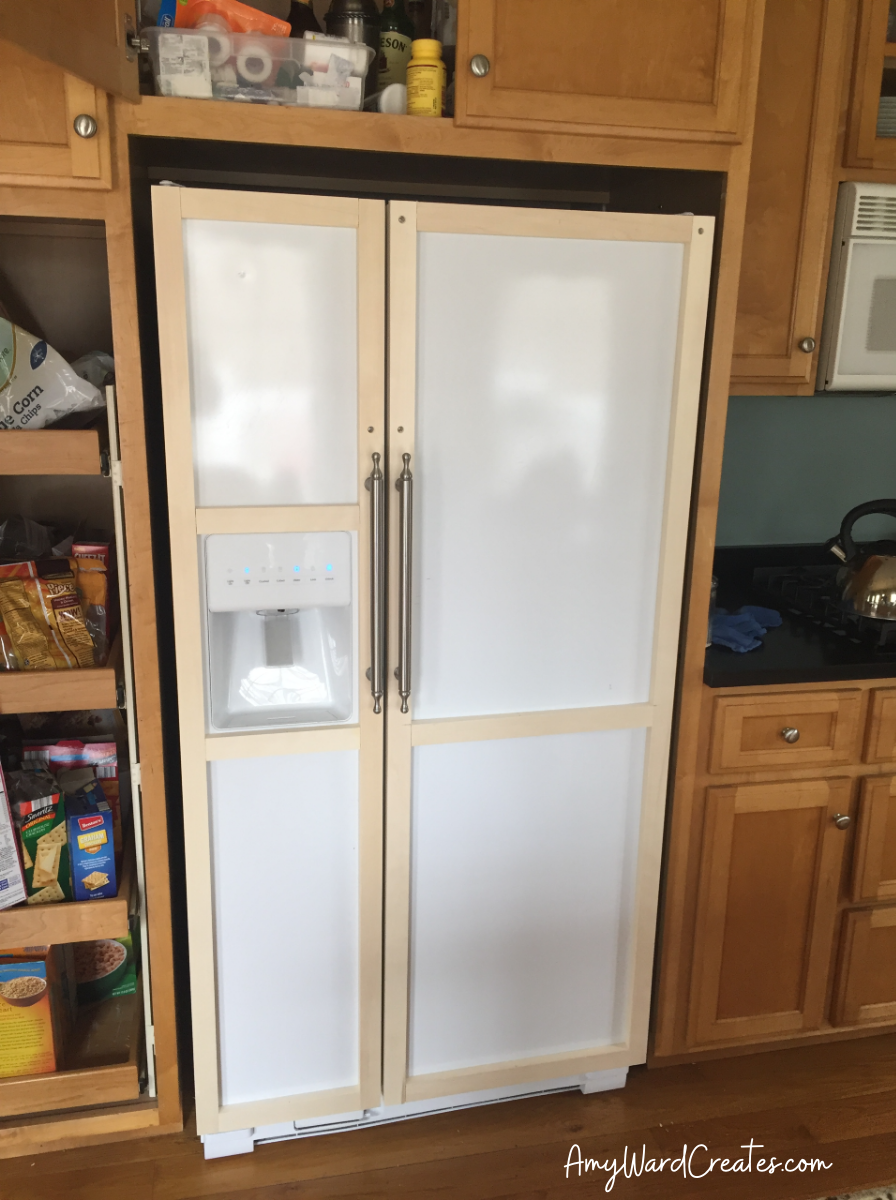
I could see my idea coming to LIFE! The fridge looked great! Even this looked better than the original, but now I needed to paint it. But with what?
Chalk paint. I love chalk paint and wax. It goes on just about everything! And since this was metal AND wood, I knew chalk paint would be up to the task. And it was.

Chalk paint is dull and rough unless it is waxed. I love waxing rather than varnishing! It is so forgiving! And no streaks like with varnish.
Also, it is very forgiving with touch ups. After 3 years of use (yep, this puppy is 3 years old!) I needed to touch up the paint job for photographing and it went on seamlessly! A little wax over the chalk paint and a little buffing and it looked like the day I finished painting it 3 years ago.
So now, for a little recap…

Which one would you prefer?
SO… If you want a fridge remodel, know that it IS possible. It might just take some thought, planning, and a very handy and accommodating husband! 😉
Happy Creating! Amy
Project - Refrigerator Remodel
Difficulty: Moderate – basic carpentry skills needed Time: a weekend or two Cost: Relatively inexpensive for what you get!
Materials:
Fridge
Decorator refrigerator handles (mine were 12 inch center to center, 16 inch overall)
1 by 2-inch boards (amounts vary according to your fridge)
Miter saw or other
Loctite Power Grab, Heavy Duty
Sheet Metal Screws (make sure they don’t go more than half an inch into fridge)
Clamps (if you feel you need more pressure)
Power drill (for screws)
Plugs (we used) or wood putty (for recessed screws)
Painters Tape (optional)
Sandpaper
Chalk Paint and Wax (brushes, cotton cloths, etc…)
Directions:
Cut boards according to your refrigerator dimensions.
Screw handles to the center boards where you want them to be on the fridge.
Glue boards in place one at a time with Loctite Power Grab. Tape or clamp in place as you go if needed. If board does not sit tight to the metal, put a screw into the board making sure to prep it so it will be recessed into the wood.
Place a screw at the top and bottom of each door handle. (If you want extra stability.)
Fill recess screws with plugs or wood putty
Let wood putty dry and sand flat or sand the plugs to be flush.
Paint and wax with chalk paint. You can also paint the kick plate at the bottom.