
Eric Carle Inspired Art Lesson
In my opinion, there is almost nothing better than Eric Carle inspired art done by little humans! It is one of my favorite projects because success is high and students are happy with the process AND product.
I have done this particular flower project with 2nd and 3rd grade students.
The element of art I target is TEXTURE and the principle of art is PATTERN. For 1st graders, I read The Very Busy Spider” and introduce ACTUAL texture along with VISUAL or IMPLIED texture. Then instead of flowers, we make spiders!
Regardless of the grade level or project, the final art pairs well with display companies that print on products such as Artsonia.
Here are some examples of my students’ work. Aren’t they BEAUTIFUL?

Actual collage art made by Mrs. Ward’s 2nd grade students.
It takes two or three 40 minute classes to complete. One class period is for painting the papers and the other two are for making the papers into a picture. The students really come up with some STUNNING ideas for their flowers!
In the past, I used white tissue paper just like Eric Carle but it tore so easily and was difficult for some students. Now I use the thinnest paper I can find which happens to be the paper on the roll for bulletin boards.
SHORTCUT FOR CUTTING THE BULLETIN BOARD PAPER
I have several hundred kids so I found this is an easy way to cut that huge paper on the roll into usable sheets.
Tear off a long sheet from the roll.
Fold it multiple time until it is the size you want (approximately 12” x 18”)
Cut off all the folds on the paper cutter
Works like a charm!
PAINT DISTRIBUTION. I’ve done it two ways and both work.
WAY 1 - The Paint and Texture Tool Table. I use lids from the copy paper boxes and each is labeled a different color. Then in that box goes several texture tools and several spill proof paint containers with paint and brushes. The kids share all the tools and paints with one rule: One paint container and texture tool at a time.

WAY 2 - Everyone Gets Their Own Materials. This came about because the students couldn’t share during Covid. So I made kits using plastic pencil cases with 6 colors in an egg carton section, texture tools, paint brush. Students will also need a way to wash their brush.
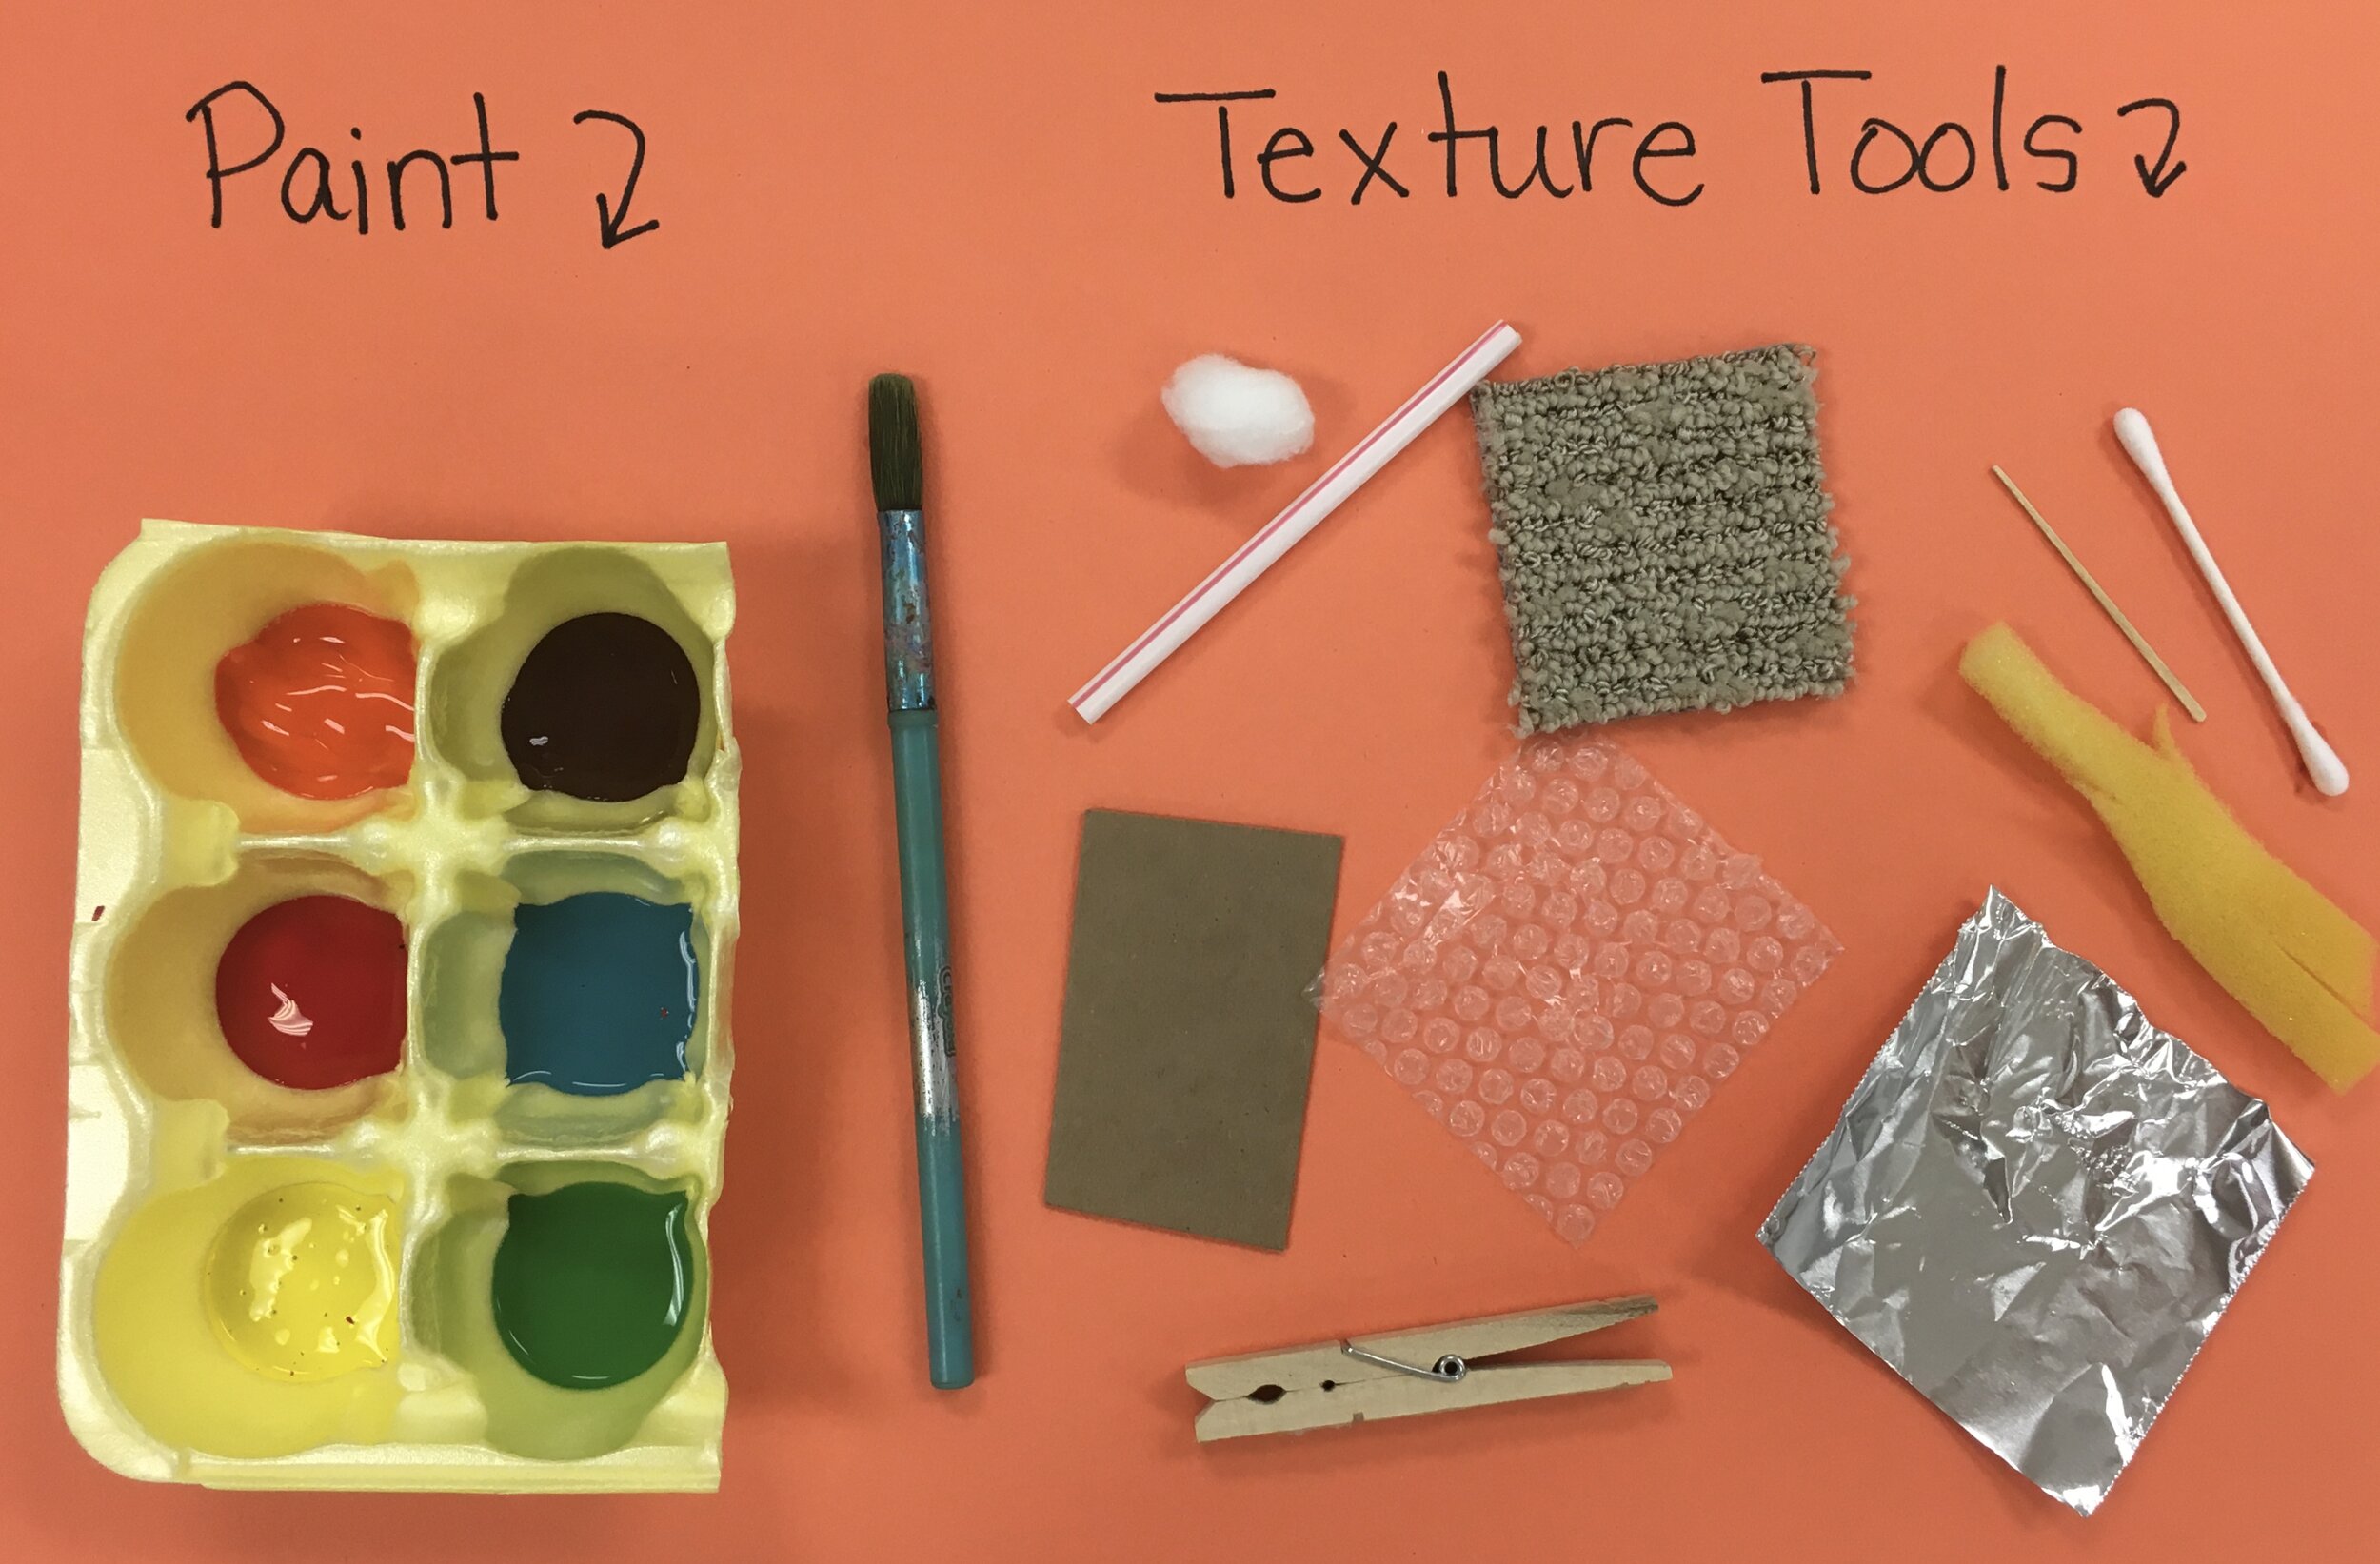
The first way is less work for me because I store the paint and brushes in one large plastic container lined with a large garbage bag (extra protection so nothing dries out) and at the end of the project, I wash the paint brushes only once. HUGE bonus!
PAINTING THE PAPERS
I usually like to use acrylic paint for this project, especially if I have the students seal over it so it is extra flat. However, I have done it with tempera and when I do it this way, we don’t seal it. It just depends on what works better for you.
Each student gets a large sheet of white paper which I have already folded into 4 sections. (I fold the whole classroom stack at once so one less step for the kids.). They get to paint 4 different colors. See the video below for more detailed information.
Video: Painting the Papers
MAKING COLLAGE ART WITH THE PAPERS
I have found that providing little ones (kindergarten and 1st grade) with patterns works best and as they get older (2nd and 3rd grade) they are able to draw and make their own patterns. Note: I copy the pattern sheet below on old or faded construction paper.
Here is my pattern sheet I use. It’s available for a dollar on Teacher Pay Teachers. Thank you for supporting me!
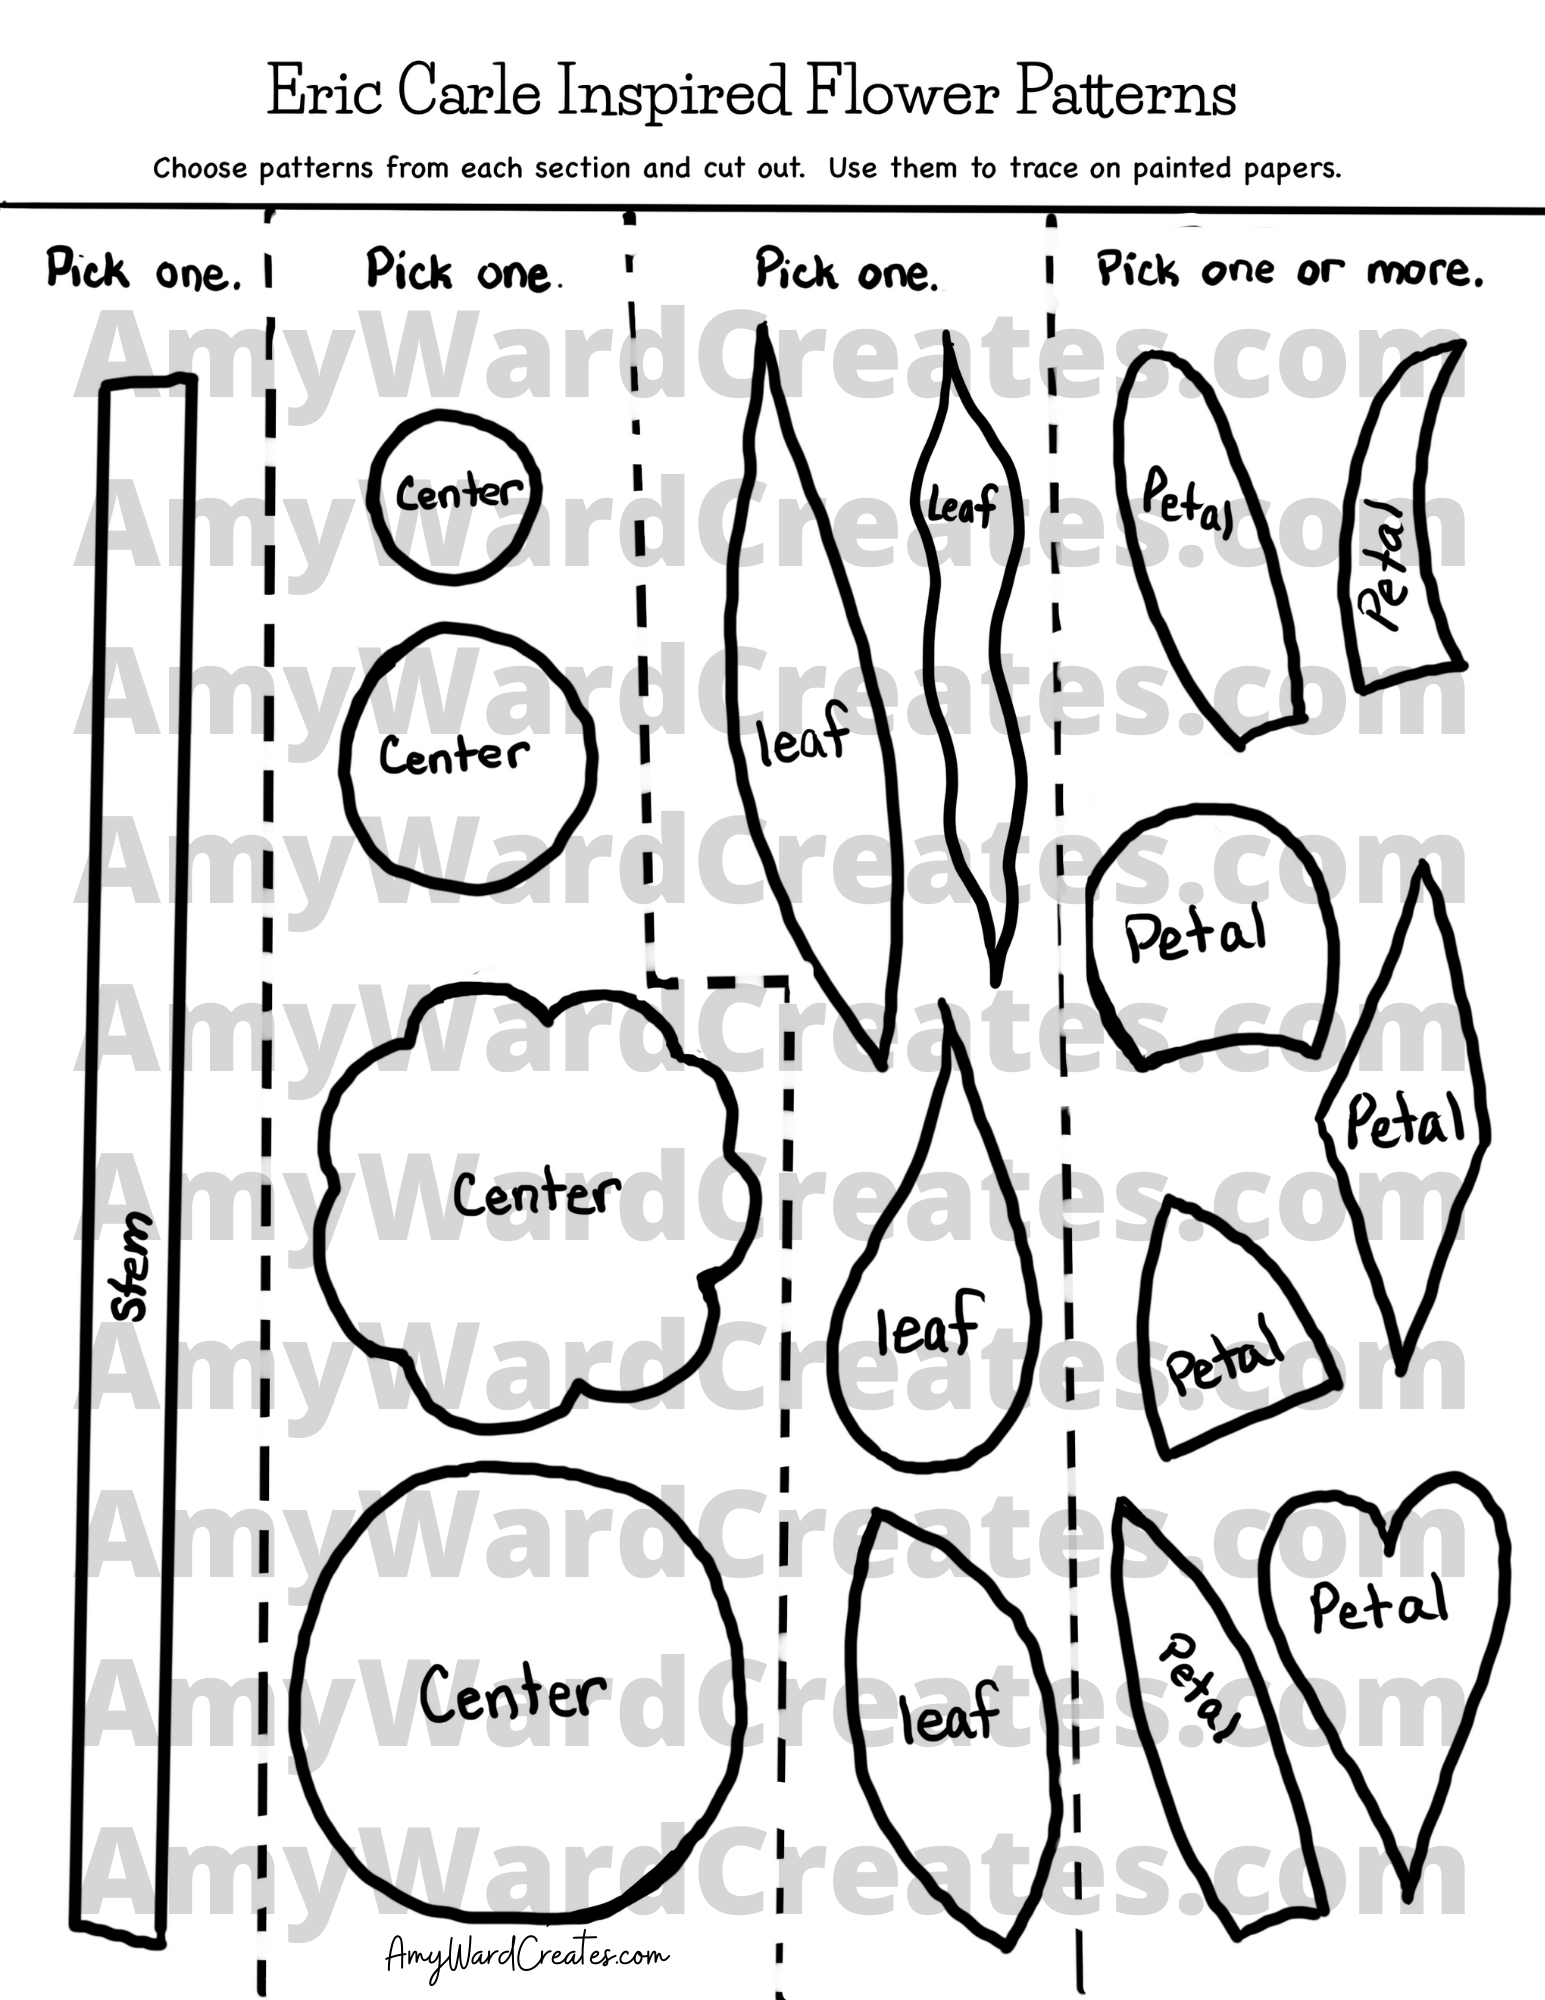
I encourage the kids to also use their imaginations and make their own pattern pieces as well. OR they can use one of the existing pattern pieces on the sheet and tweek it to their liking.
In a nutshell - here are my steps for teaching how to make a collage. For more detail, watch the video tutorial!
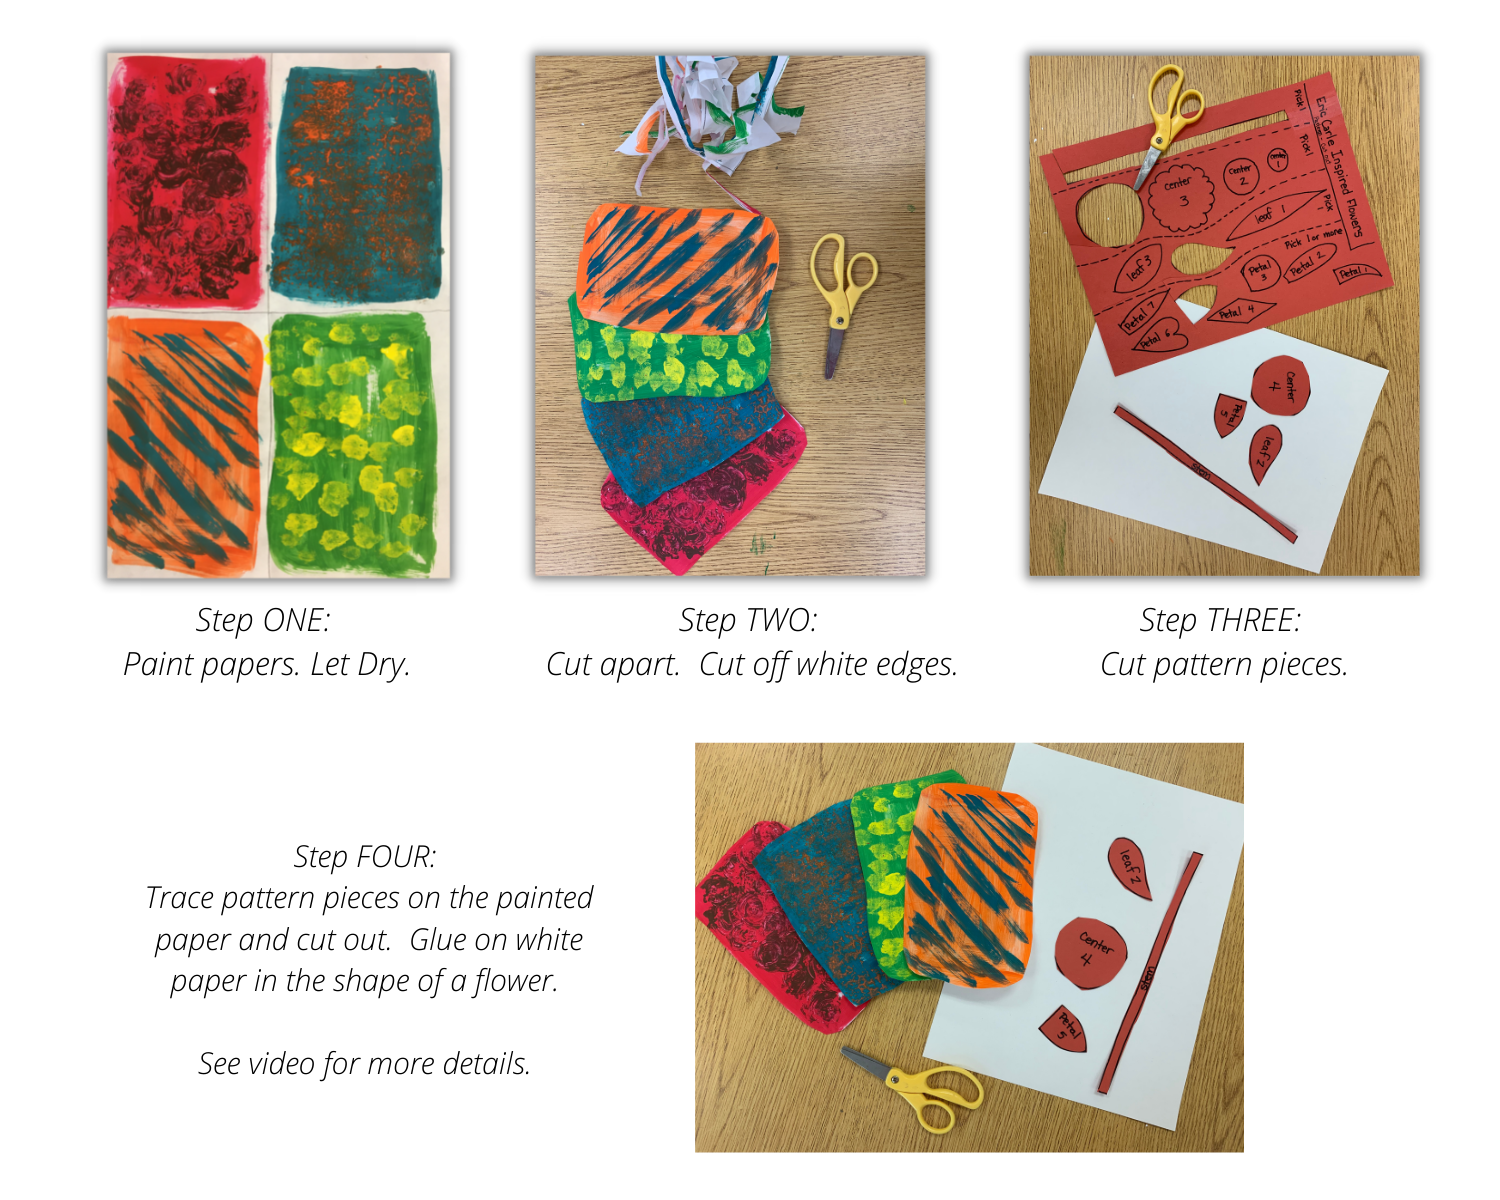
Video: Using the Papers to Make a Collage
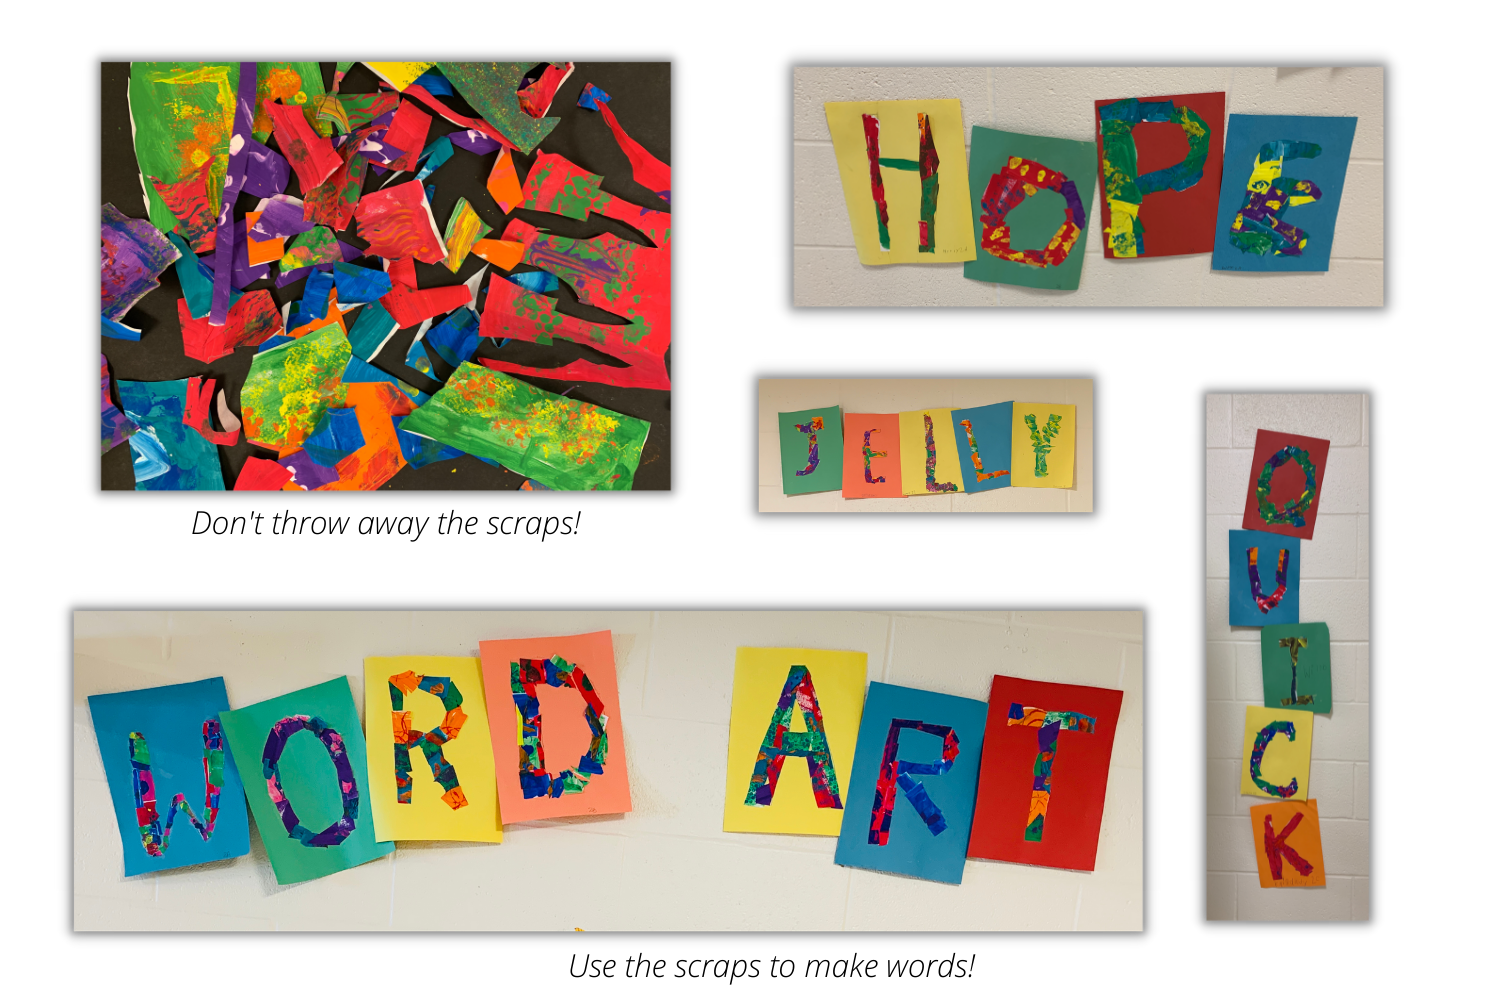
Last thing, DON’T THROW AWAY THOSE PAPERS! I teach the kids to make bubble letters and they fill them in with their leftover paper. Then, I spell words and put them on display.
If you have any questions or have a technique that you use in your classroom with this project, please leave a comment!
Thanks for visiting and remember that it’s always more fun to LIVE LIFE CREATIVELY!
Happy Creating, Mrs. Ward (Amy)